When it comes to moving fragile items, success isn't about crossing your fingers and hoping for the best. It's all about preparation. The real secret is having the right materials and a proven strategy ready to go before you even think about wrapping your first glass. With the proper supplies, you're essentially building a protective shield around your valuables, ensuring they arrive at your new home in one piece.
Setting Up Your Packing Station: The Right Tools for the Job
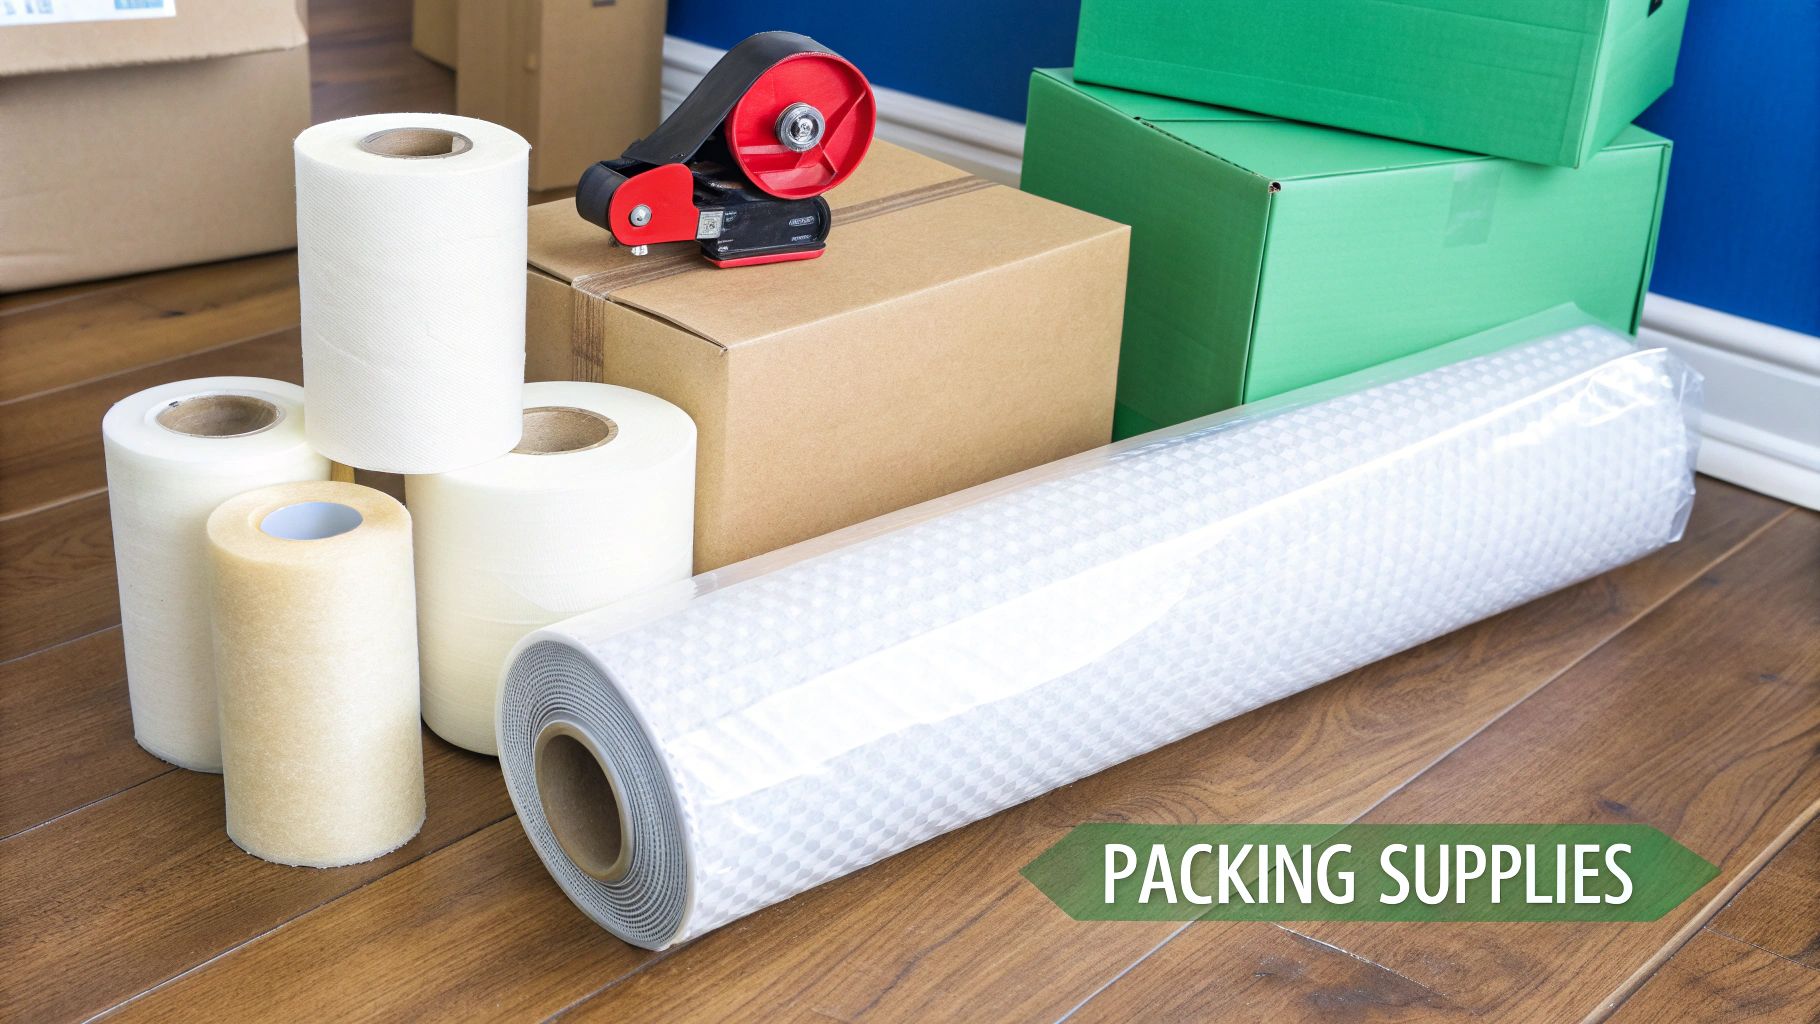
Think of your packing supplies as a specialised toolkit designed to protect against all the bumps, rattles, and unexpected jolts that are part of any move. Let's be honest: grabbing a few old grocery boxes and some newspaper from the garage just isn't going to cut it when your family heirlooms are at stake. Assembling the right kit is your first, and most important, step.
The absolute foundation of your setup should be high-quality, double-walled cardboard boxes. These are a world away from the flimsy, single-walled boxes you might get from the supermarket. They offer far superior strength and are much more resistant to being crushed under the weight of other items. For anything breakable—from your dinner plates to ceramic decorations—these are non-negotiable.
The Must-Have Materials
Before you start, you'll want to have a good supply of essential materials on hand. Having everything within arm's reach makes the entire process smoother and more efficient.
Here’s a quick rundown of what you'll need and why it matters:
Essential Packing Supplies for Fragile Items
| Supply Item | Primary Use | Pro Tip |
|---|---|---|
| Double-Walled Boxes | The main container for your fragile items. | Always check the bottom for a seal of quality. Avoid boxes that feel weak or have water damage. |
| Packing Paper | The first layer of defence for individual items. | It's perfect for preventing scratches and stopping items from clinking together inside the box. |
| Bubble Wrap | Provides crucial shock absorption. | Wrap this over the packing paper. Give extra attention to delicate parts, like the stems of wine glasses. |
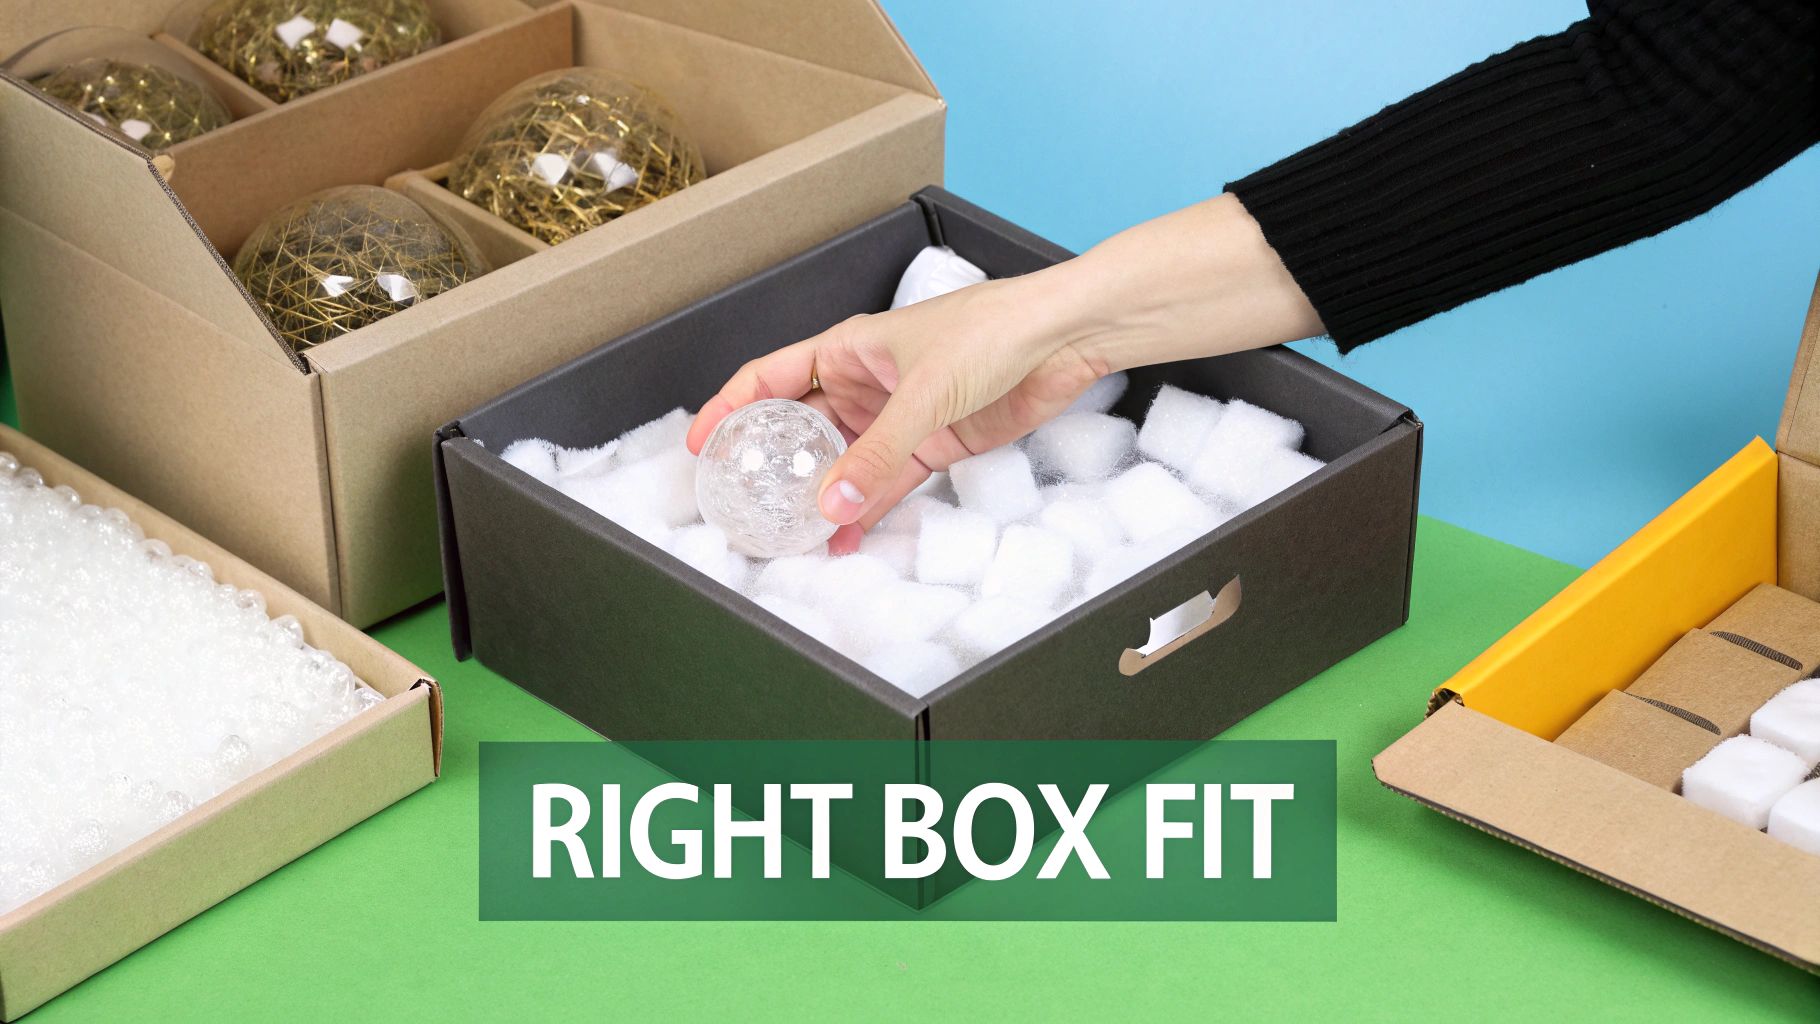
| Void Fill (e.g., Peanuts) | Fills empty gaps to prevent shifting. | You can also use scrunched-up packing paper or even old towels as an alternative to packing peanuts. |
| Cell Box Dividers | Creates individual compartments for glassware. | A true lifesaver for packing glasses, mugs, and small bottles. They stop items from ever touching. |
| Quality Packing Tape | Secures the box and reinforces seams. | Don't go cheap on tape! A strong seal keeps the box's structure intact and prevents it from popping open. |
Once you have these items ready, you're well-equipped to tackle even the most delicate packing jobs with confidence.
Why This Matters in Australia
It might seem like a lot, but consider the sheer volume of moves happening across the country. With roughly 43% of Australians moving in the last five years, often during the peak season from October to March, the chances of things getting rushed are high. This is precisely why relying on professional-grade supplies isn't overkill—it's just smart planning.
A Pro Mover's Tip: The golden rule for packing breakables is that a well-packed box should be completely silent. If you gently shake it and hear or feel anything moving inside, it’s not ready. Open it back up and add more void fill until it's snug and secure.
If you're wondering where to find all these specific materials, our guide on where to buy moving boxes is a great place to start. Getting everything you need in one go will save you from last-minute panic and make the entire process far less stressful.
Mastering the Art of Wrapping and Cushioning
Now that your packing station is ready to go, we can get into the skill that really makes or breaks a move. Honestly, knowing how to properly pack your breakables is what separates a smooth, stress-free day from a box full of heartbreak. It’s more than just chucking things in bubble wrap; it’s a genuine technique. I like to call it the ‘Cushion, Wrap, and Secure’ method, and once you get the hang of it, you'll feel so much more confident.
The very first thing you need to do, before a single item even sees a box, is to create a soft landing pad inside. This isn't just a nice idea—it's your first line of defence against shock. Grab some packing paper, crumple it up loosely, and build a springy base layer at the bottom of the box that’s at least 5 centimetres deep. This simple step absorbs so many of the bumps and vibrations from the road.
How to Wrap Different Kinds of Items
Let’s be real: not all fragile items are the same. You wouldn't wrap a delicate wine glass the same way you'd wrap a flat picture frame or a heavy ceramic vase. The trick is to treat every single item as its own little project, paying special attention to its weak spots—think handles, stems, and corners.
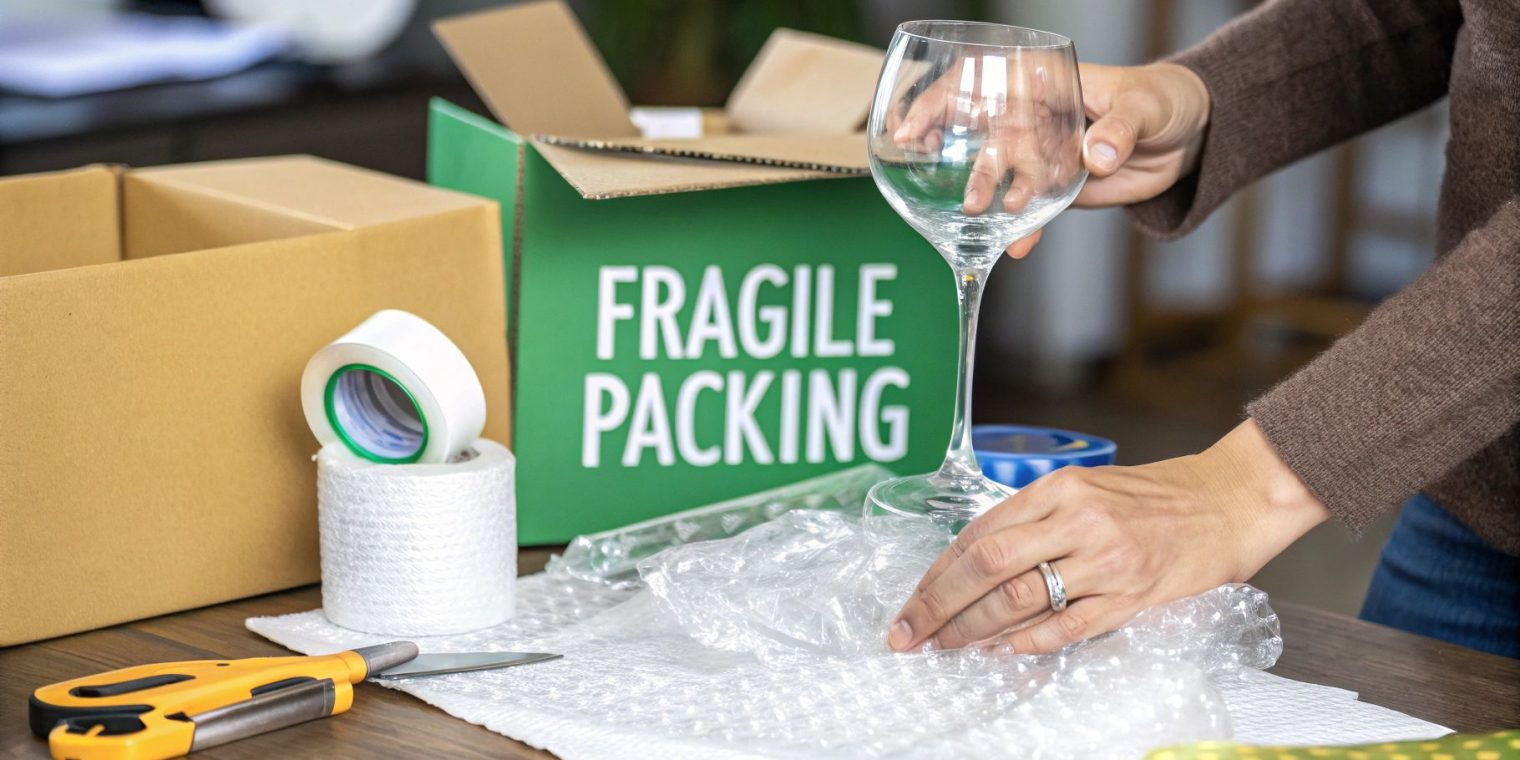
For something like a wine glass, here’s how I’d tackle it:
- First, gently stuff the bowl with some crumpled packing paper. This gives it crucial internal support.
- Next, lay the glass on its side on a flat sheet of packing paper. Start rolling it, and as you go, tuck the sides of the paper in, almost like you’re wrapping a burrito.
- For the final touch, give it a full wrap in a layer of bubble wrap and secure it with a small piece of tape. Easy.
This image shows exactly what that careful, multi-layered process looks like before the item is even placed in the box.
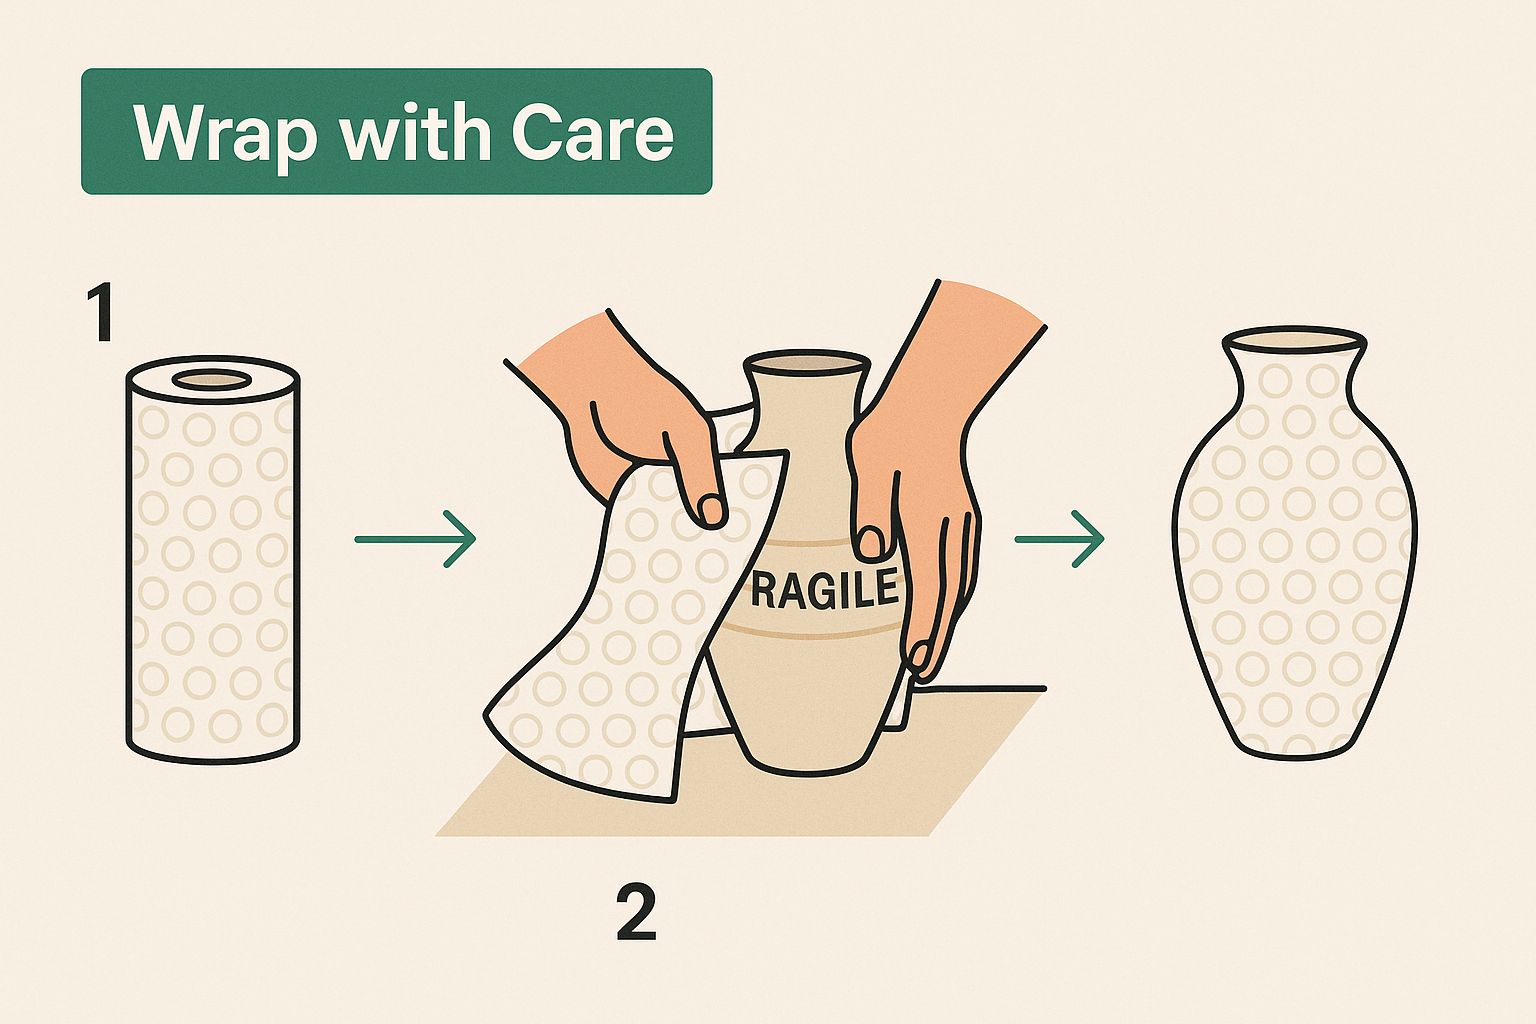
Seeing it visually really drives home why each layer is so important for giving your things the best possible protection.
Arranging Items for a Rock-Solid Box
The final piece of this puzzle is how you actually arrange everything inside the box. Always, always start with your heaviest and most solid items at the bottom, right on top of that cushiony base you made earlier. As you begin adding lighter, more delicate pieces on top, be meticulous about filling every single nook and cranny with more crumpled paper or packing peanuts.
Your goal is to create a single, solid block. When you seal the box and give it a gentle shake, you should feel zero movement inside. That complete lack of shifting is the hallmark of a perfectly packed box.
If all this detail work feels a bit much, especially when you've got a million other things to do, remember there's no shame in calling in the experts. Looking into professional packing services in Perth that save you time can be a smart move, especially for safeguarding your most treasured possessions.
For those who really want to become masters of the craft, you can learn even more by exploring professional techniques for packing fragile items for shipping. These are fantastic skills to have, whether you're moving down the road or sending something to the other side of the country.
Your Room-by-Room Playbook for Packing Fragile Items
Let's be honest, knowing how to pack fragile items isn't a one-size-fits-all skill. The way you’d pack your delicate wine glasses is completely different from how you'd handle a massive living room mirror. To make this feel less overwhelming, let's walk through the house room by room. Think of this as your personal playbook for getting everything to your new home in one piece.
Conquering the Kitchen
The kitchen often feels like the final boss of packing. It's packed to the gills with awkwardly shaped, incredibly breakable things. But with the right system, it’s much more manageable than it seems.
-
Plates, Bowls, and Saucers: The absolute golden rule here is to pack plates vertically. Never, ever stack them flat on top of each other. Think of them like vinyl records in a crate. Wrap each plate individually in packing paper, then slide them into a sturdy, double-walled box on their edges. Crumple up some paper to fill any gaps so they can't shift around.
-
Glassware and Mugs: When it comes to glasses and mugs, cell box dividers are an absolute game-changer. They create little individual compartments that prevent your items from clinking and clashing. Just wrap each glass in a sheet of packing paper—giving extra attention to fragile stems—and place it into its own dedicated cell. This one simple tool drastically cuts down the risk of finding a box full of broken glass at the other end.
Securing the Living Room
Your living room is usually a mixed bag of bulky electronics and precious decorative items. Each one needs its own strategy.
-
Mirrors and Artwork: For any large framed pictures or mirrors, start by making a big 'X' across the glass with masking tape. This won't magically stop it from cracking if there's a major impact, but it will hold the shards together and stop them from damaging the frame or cutting you. After that, wrap the entire piece in a few generous layers of bubble wrap and slide it into a proper mirror box. It's the best protection you can give it.
-
Lamps and Lampshades: Always take lamps apart before you pack them. Unscrew the lightbulb and take off the lampshade. The shade is incredibly easy to dent, so give it its own box with plenty of soft padding. You can then wrap the lamp base in bubble wrap and pack it in a box with other solid, sturdy items.
A Dose of Reality: It's important to realise what your belongings are up against. Australia's road freight transport market is a massive industry, valued at around AUD 101 billion. Your items will join a system that has over half a million rigid trucks covering some seriously long distances. This isn't just a trip around the corner; it's a journey. Suddenly, taking that extra five minutes to pack properly doesn't seem like overkill, does it? You can read more about the scale of Australian freight transport to appreciate why meticulous packing is so critical.
Protecting Electronics and Collectibles
These are often the items that are most expensive—or impossible—to replace, whether it’s high-tech gear or something with huge sentimental value. Give them the extra care they deserve.
-
Televisions and Consoles: If you've still got the original packaging, you've hit the jackpot. Use it. It was literally designed to protect that exact item. If that box is long gone, your next best bet is to wrap the TV in a soft blanket or bubble wrap, making sure the corners are well-padded. Gather up all the cords and remotes, put them in a labelled zip-lock bag, and tape it securely to the back of the TV.
-
Collectibles and Figurines: For those small, intricate things like ceramic figurines or delicate ornaments, the "box-within-a-box" method is your friend. Wrap the item carefully in bubble wrap, nestle it into a small box filled with padding, and then put that small box inside a larger moving box. This double layer of protection provides fantastic shock absorption.
Don't Skip the Final Touches: Sealing and Labelling Your Boxes
It’s easy to breathe a sigh of relief once everything is snug inside a box, but the job isn't quite done. A perfectly packed box can become a mover's nightmare if it splits open on the way to the truck or ends up in the wrong room. Sealing and labelling are your final, crucial steps—think of them as the lock and key for all your hard work.
If you watch a professional removalist at work, you'll notice they never just slap one piece of tape across the middle and call it a day. That single strip simply won't hold up under the strain of a real move. For a truly secure box, you need to use what we in the industry call the “H-tape” method.
The H-Tape Method: Your Box’s Best Defence
This technique is the gold standard for a reason. It reinforces every seam, creating a seal that can actually handle the weight of what's inside and prevent the bottom from unexpectedly giving way. It’s simple but incredibly effective.
- First, run a strip of high-quality packing tape right down the main seam where the flaps meet in the centre.
- Next, tape across the two shorter side seams.
- Once your box is packed and ready to close, you’ll do the exact same thing on the top.
You’ll be left with a clear ‘H’ pattern on both the top and bottom of your box. This is one of those small details that makes a massive difference when learning how to pack fragile items for moving properly.
Labelling: More Than Just a Marker Scribble
So many people make the mistake of just scrawling "FRAGILE" on one side of the box. An effective label is a communication tool—it needs to tell the person carrying it exactly what to do (and what not to do) without them ever having to guess.
A great label tells a story: what's inside, which way is up, and where it's headed. This eliminates confusion and is your best bet for preventing careless mistakes.
For your system to be foolproof, you need to include three key things on at least three sides of the box. That way, your instructions are visible no matter how the box is stacked.
- Be Specific About Contents: Don't just write "Kitchen Stuff." Get descriptive. For example: "FRAGILE – Wine Glasses & Mugs" or "FRAGILE – Living Room Lamps." This gives the mover a mental picture of what’s inside.
- Show the Direction: Draw big, bold arrows pointing up and write "THIS WAY UP." This is absolutely essential for things like vases, electronics, or anything liquid that can't be tipped over.
- Name the Destination: Clearly mark which room the box belongs in. Think "Kitchen," "Master Bedroom," or "Study." This is a gift to your future self.
Getting this right not only protects your belongings on the journey but also turns the chaos of unpacking into a much more organised and efficient process. You'll thank yourself later.
Loading and Transporting Your Valuables Safely
https://www.youtube.com/embed/eZTVyvQrCgc
All that careful packing comes down to this moment: moving day. How you load the truck is just as important as how you packed the boxes. If you get this part wrong, all your hard work could be for nothing. The golden rule here is to build a solid foundation.
Think of it like a real-life game of Tetris, but with your most precious belongings. Start by loading your heaviest and most solid items first. Things like appliances, dressers, or boxes of books should go on the floor of the truck, creating a stable base. Only then should you start bringing in the fragile boxes, keeping them well away from the edges where they could get bumped or crushed.
Smart Loading Strategies
Whether you're doing a DIY move or directing a team of professionals, spatial awareness is everything. It's tempting to squeeze a box into a small gap just to make it fit, but that's how things get broken. Fragile boxes need to be placed in secure spots where they won't shift or get compressed if the load moves during the journey.
A great trick I've learned over the years is to create 'safe zones' inside the truck. For example, you can sandwich fragile boxes between two mattresses or place them on top of a flat, sturdy surface like a chest of drawers. This gives them a stable platform and stops them from tumbling over when the truck hits a bump.
Beyond the physical packing and loading, don't forget about financial protection. It's always a good idea to understand how home insurance includes content insurance to ensure your valuables are covered, just in case.
Communicating with Your Removalists
If you've hired a moving company, clear communication is your most powerful tool. Don't just assume they know which boxes are delicate. Before they even start, do a quick walkthrough. Point out every single box you've marked as fragile and tell them what's inside.
A simple "Be careful with that one, it's all our wine glasses," or "This box has my grandmother's antique lamp," gives them crucial context. Good removalists will always appreciate the heads-up and will know exactly where to place these items for the safest possible ride.
This is especially true for longer trips. The Australian removalist industry is valued at roughly AUD 1.8 billion, with a huge chunk of that coming from interstate moves. When your belongings are travelling over 250 kilometres, the risk from constant vibration and extra handling goes way up. Your diligence during the loading process becomes absolutely critical.
Key Takeaway: Treat your fragile boxes as "last on, first off." Load them near the back of the truck so they can be the first things carefully unloaded at your new place. This simple step prevents them from being buried under heavier items and minimises the risk of damage.
Answering Your Biggest Fragile Packing Questions
Even with a solid game plan, you're bound to run into a few tricky situations when you’re elbow-deep in packing paper. Knowing how to pack fragile items for a move often comes down to solving these specific problems on the fly. Here are some of the most common questions we get, with practical answers from years of experience.
Can I Use Towels and Blankets Instead of Bubble Wrap?
It's a common money-saving hack, but honestly, towels and blankets aren't a direct substitute for proper packing materials. They're brilliant for filling up big empty spaces in a box or adding an extra layer of cushioning around already-wrapped items. Think of them as a great way to stop things from shifting around.
But they just don't have the same shock-absorbing power as bubble wrap. When it comes to really delicate things—like fine crystal, antique china, or even a computer monitor—you still need to wrap them directly in bubble wrap or packing paper first. Use your linens as the backup, not the first line of defence.
What Is the Single Biggest Mistake People Make?
Hands down, the most frequent and costly mistake is leaving empty space inside the box. It’s so easy to do. You carefully wrap a vase in three layers of paper, nestle it in a box, and figure you’re done. But the moment that box is moved, the vase starts sliding and rattling around, and all that careful wrapping becomes useless.
A perfectly packed box of breakables should have zero room for movement. Before you even think about taping it shut, give it a gentle shake. If you feel or hear anything shift, you've got more work to do. Re-open it and stuff every last gap with packing peanuts, crumpled paper, or even soft cloths until the contents are completely snug.
Are Speciality Boxes Really Worth the Extra Cost?
For anything valuable or for a move that's more than just around the corner, the answer is an emphatic yes. Investing in speciality boxes, like dish packs or mirror boxes, is really an investment in your own peace of mind. Dish pack boxes are built with much stronger, double-walled cardboard and often include cardboard dividers that keep each plate or glass safely isolated. Mirror boxes are designed specifically to stop large, flat items from flexing and cracking in transit.
They might cost a little more upfront, but that extra expense is tiny compared to the cost—and the heartache—of replacing a shattered heirloom mirror or a whole set of dinnerware. While this guide has you covered for breakables, you can explore a broader set of strategies in this excellent overview of professional packing help for your entire move.
Remember, choosing the right movers is just as important as using the right box. It’s always a good idea to know the right 11 questions to ask when hiring a removalist to make sure they're equipped to handle your fragile possessions with professional care.
Feeling overwhelmed by the thought of all that packing? Let the experts at Emmanuel Transport take it off your hands. Our professional packing services ensure your fragile items are wrapped, secured, and transported with the utmost care, giving you a completely stress-free move. Get your free, transparent quote today by visiting emmanueltransport.net.au.