Let's be honest, the secret to a stress-free Perth move has less to do with the truck and everything to do with how you handle your moving boxes in a house. After years in this business, I can tell you that a smart, organised approach to packing doesn’t just protect your belongings—it protects your sanity.
Your Essential Guide to Managing Moving Boxes
A disorganised move is a recipe for disaster. We've seen it countless times: things get broken, the moving day drags on forever, and unpacking feels like an impossible puzzle. The trick is to create a simple system before you even start, whether you're leaving a small apartment in Subiaco or a big family home up in Joondalup. This guide will walk you through the practical steps to get it right from the very beginning.
It’s no secret that Perth is a busy place for relocations. We’re seeing a huge number of people moving within the metro area—recent figures show 48,200 households, or about 9.2% of the population, move locally every year. With residential moves making up 60% of that and averaging 65 boxes per house, it adds up. We're talking about 1.88 million boxes being shuffled around Perth by families just like yours annually. It really puts into perspective how crucial good box management is.
Setting Up Your Packing Station
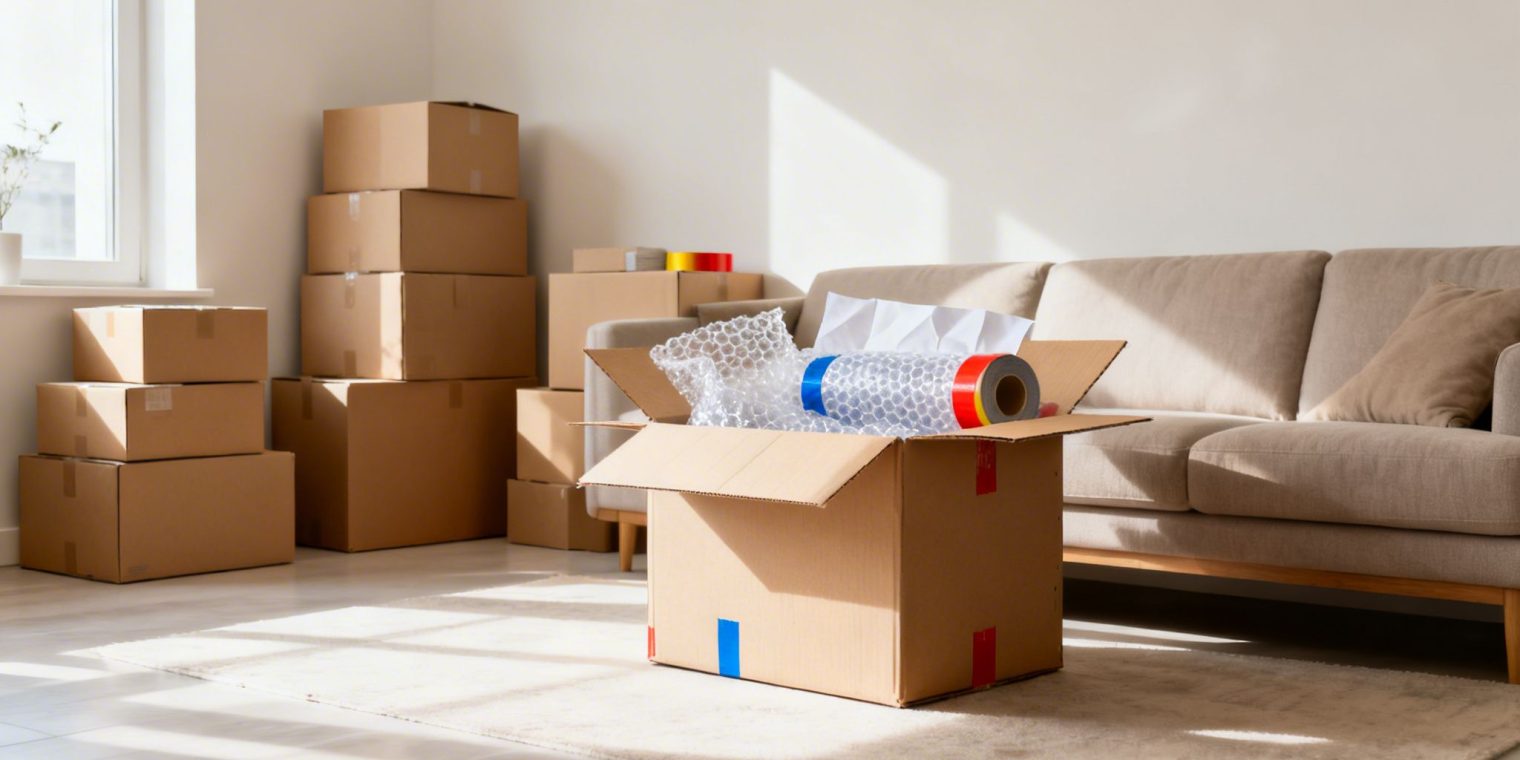
First things first: don't just start throwing things in boxes. Designate one spot in your home as your official "packing station." This could be a spare room, a corner of the garage, or even the dining table. The key is to keep all your supplies in one place so you aren't constantly hunting for the tape or a marker. It saves so much time and frustration.
Before you start packing, it's a good idea to gather all the necessary supplies. A well-stocked station is the foundation of an organised move.
Here's a quick rundown of what you'll need for a standard three-bedroom house.
Quick-Start Packing Supply Checklist
| Item | Recommended Quantity | Pro Tip |
|---|---|---|
| Small Boxes | 20-25 | Perfect for heavy items like books, tools, and canned goods. Don't overfill them! |
| Medium Boxes | 25-30 | Your workhorse box for kitchenware, toys, and small appliances. |
| Large Boxes | 10-15 | Use these for light, bulky items only—linens, pillows, and lampshades. |
| Packing Tape | 6-8 Rolls | You'll use more than you think. Get quality tape that actually sticks. |
| Bubble Wrap | 2-3 Rolls (30m) | Essential for wrapping fragile items like glasses, plates, and photo frames. |
| Packing Paper | 1 Large Bundle | Use it to wrap individual items and fill empty spaces to prevent shifting. |
| Permanent Markers | 3-4 (Different Colours) | Assign a colour to each room for quick identification on moving day. |
| Box Cutter/Scissors | 1-2 | A must-have for cutting tape, paper, and eventually, for unpacking. |
Having these supplies ready to go will make the entire packing process smoother. If you want to simplify things even further, you can often find all-in-one house removal packs that bundle everything together for you.
The First-Night Essentials Box
Here's a piece of advice that every single one of our clients thanks us for: pack a "first-night" essentials box. This is the very last box that goes onto the truck and the absolute first one you open at your new place.
Think of it as your survival kit for the first 24 hours. It should contain everything you'll need immediately upon arrival, eliminating a frantic search through dozens of boxes when you're already exhausted from the move.
So, what goes in it? Think toiletries, a change of clothes for everyone, crucial medications, and phone chargers. We also recommend throwing in the kettle, some coffee or tea, a couple of mugs, and maybe some snacks. Basically, anything you'd need to feel human after a long day. If you need more tips on what to plan for, you can find a wealth of information in our guide to Perth removals and storage.
Gathering the Right Packing Supplies
Before you even think about putting a single item into a box, let's talk about what will make or break your move: your supplies. After years in this business, I can tell you that trying to pack with flimsy boxes and cheap tape is a recipe for disaster. It’s frustrating, slow, and almost guarantees something will get damaged.
Getting this first step right is all about setting yourself up for a smooth, stress-free day.

It’s easy to take the humble cardboard box for granted, but it truly revolutionised moving. We’ve come a long way from cloth bundles and heavy wooden crates. Historical records show that by the early 1920s, corrugated cardboard was becoming the go-to choice in Perth. By 1951, government data showed that around 28,500 households moving within the metro area were using cardboard, which cut their packing time by an incredible 45%. You can learn more about how moving data has evolved over the years.
This just goes to show why quality has always mattered. Believe me, not all moving boxes are created equal.
Choosing the Correct Box Types
One of the most common mistakes we see is the wrong stuff in the wrong box. A massive box overflowing with books is a classic rookie error—it’s a one-way ticket to a sore back and a box with a split bottom. Here’s a quick rundown of how to match your gear to the right container:
Book Boxes (Small): These are your little champions. Their compact size makes it impossible to overpack them with weight, so they're perfect for books, tools, wine bottles, and canned goods.
Standard Boxes (Medium): The true workhorse of any move. This is your go-to for most things—kitchen gadgets, toys, and general household items. They hit the sweet spot between space and a manageable weight.
Linen Boxes (Large): These are strictly for items that are big but light. Think pillows, doonas, cushions, and lampshades. If you fill these with anything heavy, they’re almost guaranteed to fall apart.
Wardrobe Boxes: These are an absolute game-changer. They’re tall boxes with a metal bar across the top, so you can move your clothes straight from the closet. No folding, fewer wrinkles, and hours of your life saved.
Getting the right number of boxes is just as crucial as getting the right type. There’s nothing worse than running out of supplies halfway through packing. It kills your momentum and sends you scrambling to find more. It’s always better to have a few too many than not enough.
If you’re scratching your head wondering how many boxes you’ll need, our team built a handy tool to take the guesswork out of it. Check out our free online packing calculator for a personalised estimate based on your home’s size.
Beyond the Box: Essential Supplies
While boxes get all the attention, it’s the supporting cast that truly protects your valuables. Whatever you do, don't skimp on these items.
Quality Packing Tape: Cheap tape that peels off is a massive liability. You need strong, wide packing tape to properly seal the top and bottom of every single box.
Permanent Markers: Clear labelling is your new best friend. Grab a few thick, permanent markers and label at least two sides of every box—the room it belongs to and a brief list of contents.
Bubble Wrap and Packing Paper: This is your front line of defence for anything fragile. Use bubble wrap for your most delicate items like glassware and electronics. Use crushed packing paper to fill any gaps in the box to stop things from shifting and bumping around during the drive.
A Strategic Room-by-Room Packing Plan
Looking at your entire house and thinking, "I have to pack all of this," is a surefire way to feel overwhelmed before you even start. Believe me, I've seen it countless times. The secret isn't to work harder, but to work smarter. A room-by-room approach transforms a mountain of a task into a series of manageable molehills.
The trick is to build momentum without turning your daily life upside down. Start a few weeks out in the rooms you use the least—think guest bedrooms, the formal dining room, or that study nook. Pack up the books, out-of-season decor, and anything you won't miss. Then, save the chaos of the kitchen and your main bedroom for the final week.

Conquering the Kitchen
Ah, the kitchen. It’s almost always the most challenging room, packed with fragile items, awkward appliances, and a surprising number of heavy things. But a solid system makes all the difference.
First things first: use small, sturdy boxes. It's a non-negotiable. Kitchen items are deceptively heavy, and a big box filled with crockery is a recipe for a dropped box and a broken back. Keep each box under 20kg. Your movers (and your spine) will thank you.
When it comes to plates and bowls, forget stacking them flat. Here’s how the pros do it:
Start by lining the bottom of a small, strong box with a good cushion of crumpled packing paper.
Wrap each plate individually in paper—don't be stingy.
Now for the crucial part: stand the plates on their edges inside the box, like files in a cabinet. This simple change in orientation makes them incredibly resistant to breaks from pressure or bumps.
Stuff any empty spaces with more paper to stop things from shifting around during the trip.
For your glassware, wrap each piece and stand them upright. If you have a lot of wine glasses or fragile stemware, cell-divider inserts are well worth the small investment. Pots and pans are easier; just nest them inside each other with a sheet of paper in between to prevent scratches.
Packing the Bedrooms and Wardrobes
Bedrooms are your sanctuary, and packing them can feel a bit personal. Get an early start by boxing up things you won't need in the immediate future, like off-season clothes, spare linen, books, and wall art. Clearing this stuff out first makes the final pack much faster.
If you take one piece of advice for the bedroom, let it be this: use wardrobe boxes. These tall boxes with a built-in hanging rail are a game-changer. You can transfer clothes straight from your closet to the box in minutes. It saves a massive amount of time on folding, packing, and—most importantly—ironing at the other end.
Pro Tip: Your linen cupboard is a treasure trove of free packing material. Use towels, jumpers, and even socks to wrap fragile items like photo frames or small electronics. It’s a brilliant way to cushion your breakables and get your soft items packed at the same time.
Handling Electronics and the Garage
Modern electronics can be tricky. If you were savvy enough to keep the original packaging for your TV or computer, you’re a genius—use it. If not, don’t panic. Wrap the item in soft blankets or a generous amount of bubble wrap, place it in a snug-fitting, sturdy box, and make sure it can’t wobble around. And before you unplug that spaghetti of cables, snap a quick photo of the back of your devices. It will make reconnecting everything a thousand times easier.
And then there's the garage. This is often where good intentions go to die, amidst half-empty paint tins and rusty tools. Be ruthless. Safely dispose of any hazardous chemicals, oils, or paints that movers can't legally transport. Make sure to drain the fuel from your lawnmower and other petrol-powered equipment. For all those long-handled rakes, brooms, and shovels, just bundle them together with some packing tape.
Feeling like you need a more detailed timeline to keep it all straight? Our comprehensive moving planner lays it all out for you, week by week.
By breaking down your home into these logical zones, packing becomes a series of small, satisfying wins instead of one giant, stressful project.
Labelling Your Boxes for a Seamless Unpack
What you do right now with a permanent marker is going to make or break your first few nights in the new house. Seriously. A smart labelling system is the one thing that separates a smooth, organised unpack from absolute chaos. It’s the most common corner people cut, and they always regret it when they're digging through twenty boxes just to find the coffee maker.
Don’t overthink it. The easiest way to start is by colour-coding each room. Grab a few different colours of tape or markers—blue for the master bedroom, yellow for the kitchen, green for the living room, you get the idea. This simple visual trick lets you and your movers know exactly where a box goes with just a glance, making the whole unloading process move so much faster.
The Professional Labelling Method
Once you've got your colours sorted, it's time to add the details. And please, don't just scribble "Kitchen" on the top of the box. As soon as that box is stacked, that label is gone.
Here’s what we do on the job: we label at least two sides of every single box. This is non-negotiable. On each side, we write three key things:
Destination Room: Where it’s going. Be specific (e.g., "Kitchen," "Liam's Bedroom").
Brief Contents: A quick summary of what’s inside (e.g., "Pots & Pans," "Everyday Glasses," "Board Games"). This is your roadmap for prioritising what to unpack first.
Special Handling: If it's heavy or delicate, write HEAVY or FRAGILE in big, bold letters. You want this to be impossible to miss.
This simple, three-part system, visible from multiple angles, gives your moving crew all the info they need to place boxes correctly and handle your belongings with the right care.
An organised inventory is the ultimate peace of mind. It transforms that overwhelming feeling of "Where is everything?" into the calm confidence of "I know exactly where that is." This small bit of admin work is your best defence against unpacking chaos.
Creating a Master Inventory List
If you really want to be on top of your game, create a master inventory list. This doesn't have to be fancy; a simple notebook or a spreadsheet will do just fine. The tool isn't as important as the process. As you tape up each box, give it a number (e.g., Kitchen #1, Kitchen #2).
On your list, jot down the box number, its destination room, and a slightly more detailed summary of what's inside. This system is a lifesaver. Not only does it help you find things in a pinch ("Where did I pack the dog bowls? Ah, Kitchen #4."), but it also serves as a checklist to make sure every single box has made it from point A to point B. It’s a brilliant tool for accountability.
When you think about the sheer number of boxes involved, tracking them just makes sense. For a standard three-bedroom family home in a Perth suburb like Mount Hawthorn or Scarborough, we often handle around 75 medium-sized boxes. Annually, that adds up to a staggering 3.375 million boxes used in Perth alone. You can see more fascinating stats about the scale of moving in this detailed analysis. With that many moving boxes in a house, having a good list isn't just a nice idea—it's essential.
Staging Your Boxes for a Flawless Moving Day
The way you arrange your packed boxes before the truck arrives can make or break your moving day. Seriously. It’s the difference between a smooth, efficient move and a long, frustrating day of tripping over things. We call this ‘staging,’ and it’s the pro secret to helping your removalists work at their best pace. It’s all about creating clear paths and logical order from what can easily become chaos.
Think of it this way: in every room, your goal is to gather all the packed boxes and line them up neatly against one wall. This simple action instantly carves out wide, open walkways. Your movers can then zip in and out with dollies and furniture, without a slalom course of boxes blocking their way. A clear path is a safe path, and it drastically cuts down the risk of someone tripping or bumping into a wall. You're not just piling up boxes; you're choreographing the entire move.
The Art of Stacking: More Than Just Making Piles
Once you’ve got your boxes grouped by room, it’s time to stack them. And no, this isn't a game of Jenga. There are some non-negotiable rules to follow that will protect your belongings (and your movers' backs). The golden rule is one you've probably heard before, but it bears repeating: heavy on the bottom, light on the top. That little box of books that weighs a tonne? It goes on the floor. The big, bulky box of doonas and pillows? It goes right on top.
Here’s how we stack boxes for safety and efficiency:
Always start with your heaviest boxes to create a solid, stable base for any stack.
Try to stack boxes of a similar size on top of each other. A small box on a huge one can easily topple over.
Don’t get carried away. Never stack boxes more than four high. Any taller and the stack becomes a wobbly, dangerous tower.
As you stack, make sure the labels are facing outwards. There's nothing worse than having to play Tetris with a stack just to see where it's going.
People often think staging is just about making tidy piles. But from a removalist's perspective, it’s a strategic move that lets us load the truck with precision. We can grab the heavy items first, pack lighter boxes around them, and secure fragile goods in the safest spots. That efficiency translates directly into a faster move, which saves you real money on the final bill.
This simple, three-step labelling method is the foundation for great staging. Get this right, and everything else falls into place.

With a system of colour-coding, clear labelling, and a quick contents list on each box, you've made every single one instantly identifiable.
Don't Forget Your Special Boxes
Finally, you need to pull out your most important boxes. Your 'first-night' essentials box—the one with the kettle, coffee, toilet paper, and phone chargers—should be kept separate from everything else. Mark it clearly with "LOAD LAST, UNLOAD FIRST" and tell your movers. This ensures it's the very first thing you get your hands on at the new place.
Likewise, any boxes marked "FRAGILE" should be grouped together in a quiet corner. Keep them out of the main foot traffic so they don’t get accidentally kicked or have something fall on them. By staging your home this way, you’re not just preparing for the removalists; you’re setting yourself up for a calm and seamless transition.
Wondering how much space all those staged boxes will take up on the truck? Getting a visual can be a huge help. You can use our truck size calculator to get a better idea of how it all fits together.
When to Trust a Professional Packing Service
The thought of packing everything yourself always starts with the best intentions. "How hard can it be?" you think. "It'll save a bit of money." But the reality of DIY packing rarely matches the plan. We've seen it countless times: the sheer volume of stuff is overwhelming, the process eats up every spare evening and weekend, and then comes the gut-wrenching sound of shattered glass as you unpack a poorly packed box.
Deciding whether to pack your moving boxes in a house yourself or call in the professionals isn't just a budget question. It’s about putting a value on your time, your sanity, and the safety of your belongings.
The True Cost of DIY Packing
Sure, you might save some cash on the surface. But the hidden costs of packing your own home can stack up fast. Think about the endless trips to Bunnings for more tape and bubble wrap, the frustration of trying to find a box that fits the oddly-shaped lamp, or the risk of throwing your back out by lifting a box that’s way too heavy.
From our experience, here are the classic mistakes people make when they go it alone:
Wrong Box, Wrong Job: Putting all your books into a massive box is a rookie error. It becomes an unliftable dead weight, guaranteed to split at the bottom or strain someone's back.
"She'll Be Right" Wrapping: A single sheet of newspaper around your grandmother's fine china just won't cut it. We often see the heartbreaking results of using the wrong materials or not enough padding.
Wasted Space: When boxes aren't packed efficiently, you end up with lots of empty air pockets. That means you pay for more boxes and, ultimately, more space on the moving truck.
These seemingly small things snowball, turning the excitement of a new home into weeks of stress and chaos.
Hiring professional packers is an investment in a smoother move. You're essentially buying back your time and peace of mind, letting you focus on the important stuff—like finalising utilities and getting excited for your new chapter.
The Professional Advantage
When you bring in a team like Emmanuel Transport, you’re not just hiring a few extra sets of hands—you're getting years of on-the-job experience. Our crew knows the perfect technique for wrapping delicate wine glasses, the right way to protect a flatscreen TV, and how to pack an entire kitchen in just a few hours.
We show up with all the right gear—sturdy, high-quality moving boxes, packing paper, tape, everything. No more last-minute dashes to the shops. We know exactly how to manage moving boxes in a house, ensuring everything is packed safely, labelled clearly, and staged for a quick and easy load-up on moving day.
Ultimately, it’s about starting life in your new Perth home on the right foot—organised, calm, and with all your belongings arriving just as they left. If you're on the fence, finding out more about professional packing services in Perth can help you decide what’s right for your move.
Your Moving Box Questions, Answered
No matter how many moves we do across Perth, the same questions about moving boxes always come up. It's a huge part of the process, and it's easy to get bogged down in the details. So, let's tackle a few of the most common queries we hear from our clients.
How Many Moving Boxes Do I Really Need?
This is the first thing almost everyone asks, and the honest truth is: it really depends on your stuff. We've moved a minimalist from a two-bedroom home who needed fewer boxes than a collector living in a one-bedroom flat. It’s all about your lifestyle.
That said, you need a place to start. Here are some solid estimates we use:
Studio or 1-Bedroom Flat: Plan for around 15-25 boxes.
2-Bedroom Home: You'll probably be looking at 30-50 boxes.
3-4 Bedroom House: This is where it ramps up. Expect to need 60-80 boxes, sometimes more.
Take it from us: always get more boxes than you think you’ll need. We recommend adding an extra 10-15% to your estimate. Nothing grinds the packing process to a halt faster than running out of boxes and having to make a frantic dash to the shops.
What Is the Best Way to Pack Fragile Items?
When it comes to your breakables, your mission is to eliminate movement. Start with small, strong boxes; large ones get too heavy and are more likely to be dropped or have things shift inside.
Wrap every single fragile piece on its own. Bubble wrap is great, but several sheets of packing paper work well too. A pro tip for glasses and mugs is to stuff some crumpled paper inside them before you wrap the outside.
As you place items in the box, fill every single gap with more crumpled paper, packing peanuts, or even tea towels and linens. The goal here is to have zero wiggle room. If you give the sealed box a gentle shake and hear or feel anything move, you need more padding. Mark the box clearly on the top and all four sides with FRAGILE and add arrows for "THIS WAY UP".
Is It Okay to Reuse Moving Boxes?
Absolutely! Reusing boxes is a brilliant move for your wallet and the planet. But you have to be smart about it—a worn-out box is a recipe for disaster.
Give any second-hand box a quick once-over before you trust it with your belongings. Look for:
Strong Corners: Are the corners sharp and solid, or are they soft and crushed? A weak corner can make an entire stack unstable.
Water Damage: Any discolouration or warping is a red flag. A box that’s been wet has lost most of its strength, even if it feels dry now.
Tears or Holes: Obvious rips are a no-go. They compromise the box and won't protect what's inside from dust or impact.
If a box passes the inspection, you're good to go. Just make sure you completely black out any old labels so there’s no confusion for the moving crew on the big day.
Feeling like all this packing is a bigger job than you signed up for? Let the professionals cheap removalists take it off your plate. Emmanuel Transport offers expert packing services across Perth, ensuring every box is packed securely and ready for a smooth move. Get a free, transparent quote today!