
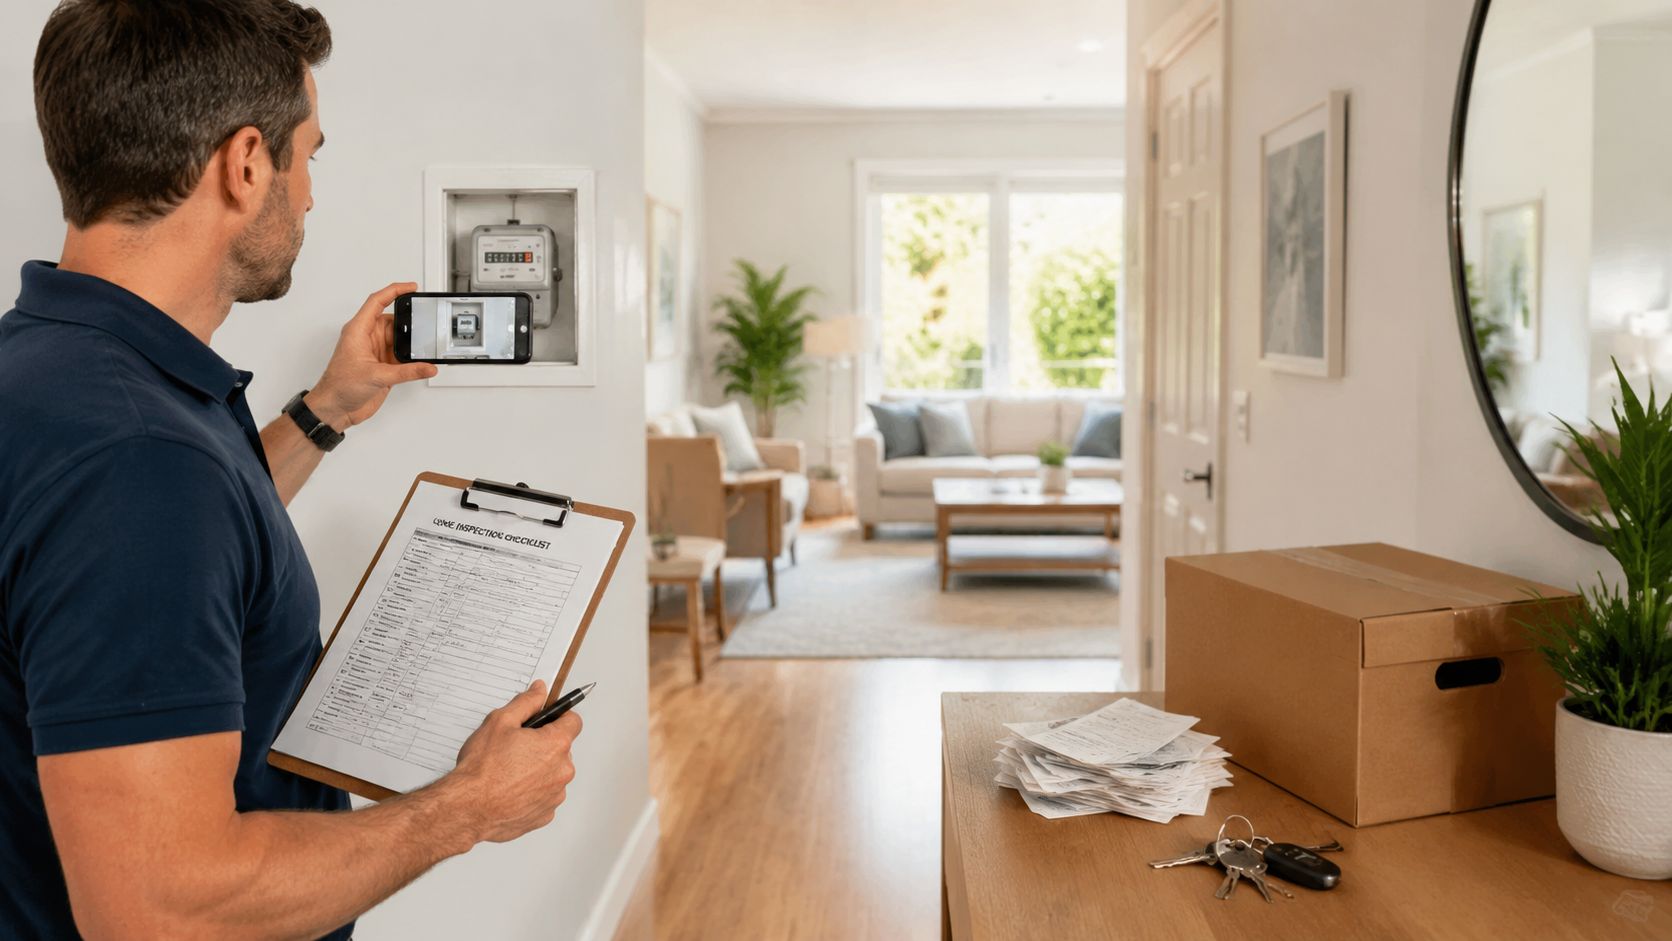
The truck is booked for 8 a.m. Keys are due at noon. Your agent says the property is ready. Then you open the front door at the final walkthrough and find a cracked blind, an unemptied garage, or a repair that was “handled” but clearly was not. At that point, every missed detail affects more than settlement. It can throw off access times, unloading plans, and who pays for the delay.
A final walkthrough is your last check before ownership or possession changes. Treat it like a verification appointment, not a quick glance around. The job is to confirm the property matches the contract, the agreed repairs are complete, the included items are still in place, and the home is empty or presented as promised. If something is off, you need evidence and a clear message ready for the agent or landlord before the handover goes ahead.
That practical link to moving day is where many checklists fall short. A stain on the carpet is one issue. A blocked driveway, missing lift booking, or unread meter becomes a removal problem within hours. If a company like Emmanuel Transport is arriving on a tight schedule, the walkthrough helps you confirm the path in, parking access, building rules, and whether the property is ready to receive your furniture without wasted labour time.
Use this checklist with that broader purpose in mind. It covers the inspection itself, but it also gives you wording to use on the spot, such as: “We’re ready to proceed once this item is documented and the next step is confirmed in writing.” It also helps you catch condition issues that are easy to miss at speed, including failed glazing. If you are unsure how to spot a broken window seal, the signs are worth reviewing before you sign off.
A careful walkthrough protects your position and keeps the move on schedule.
Table of Contents
- 2. 2. Test Every System and Appliance
- 2. 2. Test Every System and Appliance
- 3. 3. Verify Agreed-Upon Repairs and Cleanliness
- 5. 5. Document Everything Your Ultimate Proof
- 6. 6. Record Crucial Utility Meter Readings
- 6. 6. Record Crucial Utility Meter Readings
- 7. 7. Finalise Your Moving Day Logistics
- 8. 8. Prepare Your Agent Communication Script
- Final Walkthrough: 8-Point Checklist Comparison
- From Checklist to Keys in Hand
2. 2. Test Every System and Appliance

A property can look spotless and still cause trouble the moment your boxes arrive.
This part of the walkthrough is about function under normal use. Turn things on. Let them run. Open and close anything with a latch, motor, hinge, or drain. Cosmetic issues matter, but failed services are the problems that can derail your first night and force an argument with the agent after the keys are in your hand.
What deserves your time first
Start with water and power, because they affect every room and they are the hardest problems to work around on moving day. Run each tap long enough to check pressure, drainage, and whether hot water gets hot. Flush every toilet. Fill and drain basins. Turn on lights, exhaust fans, and a sample of power points with a phone charger.
Then test the included appliances one by one. Oven, cooktop, rangehood, dishwasher, split system, ducted air, garage door motor, intercom, and any laundry appliances staying with the property. A unit that powers on is not necessarily working properly. Listen for grinding, buzzing, delayed ignition, poor airflow, or drainage that backs up.
Use a simple order and stay disciplined:
- Run taps and check under sinks for active leaks
- Flush toilets and confirm they refill properly
- Test lights, switches, and a few outlets in each area
- Turn heating and cooling on, then wait to confirm output changes
- Start kitchen and laundry appliances on a basic cycle or setting
- Open windows, locks, and garage access systems if they are motorised
Give systems a minute. Rushed checks miss the defects that matter.
I tell clients to test appliances the same way they would use them in the first 24 hours. If the air-conditioner is weak, if the dishwasher holds water at the base, or if the oven trips a circuit, that affects more than comfort. It can change where the removalist places boxes, whether food can be stored safely, and how quickly you can settle into the property. If you’re coordinating timing with a mover like Emmanuel Transport, these checks help you decide whether unloading should start straight away or wait until an issue is acknowledged and recorded.
If manuals, remotes, warranty cards, or service notes are meant to stay, collect them now and put them aside together. Missing accessories are easy to overlook once people start carrying furniture inside.
If something fails, address it on the spot with direct language: “We’ve tested this under normal use and it is not operating correctly. I need this noted before settlement and confirmed in writing today.” Keep the wording calm and specific. Avoid debating how long the issue existed. Focus on the fact that the included item is not functioning now.
Cleanliness can affect testing too. Grease, lint, and heavy buildup often hide poor appliance performance, especially in ovens, rangehoods, bathroom fans, and laundry areas. If you need a benchmark for what a properly handed-over property should look like, compare your observations with this end of lease cleaning checklist for move-out standards and the expert cleaning advice from All Well. That gives you a clearer basis for raising a concern, rather than saying a room just feels dirty.
Stay practical. Test what you can verify in real time, record faults clearly, and do not let anyone rush you past a system that will be expensive or disruptive to fix once the move is underway.
2. 2. Test Every System and Appliance
A clean property can still hand you an expensive first week.
For the final walkthrough checklist, the highest-value technical checks are the ones most likely to trigger post-settlement disputes. Plumbing fixtures, HVAC, electrical outlets and switches, locks and windows, plus any appliances that convey with the property all deserve active testing, not a glance. That practical priority aligns with buyer guidance on what the final verification should cover before settlement (pre-settlement walkthrough advice).
What deserves your time first
Run every tap long enough to check pressure, drainage, and hot water. Flush toilets. Turn on exhaust fans. Test light switches and sample power points with a charger. Switch on the oven, rangehood, cooktop, dishwasher, split system, ducted air, and garage door motor if they’re included.
Listen as much as you look. A dishwasher that fills but doesn’t drain, an air-conditioner that powers on but blows warm air, or a bathroom fan that hums without moving air can all slip past a rushed check. If the seller or landlord has left manuals or warranty documents, collect them. Independent buyer guidance specifically recommends confirming manuals and warranties are available before settlement (buyer final walk-through checklist).
Use this quick test order if time is tight:
- Water first: Kitchens, bathrooms, laundry, and any outdoor tap.
- Power next: Lights, switches, major outlets, and smoke alarm indicators if visible.
- Climate control after that: Heating, cooling, remotes, thermostats, vents.
- Appliances last: Oven, dishwasher, rangehood, microwave, and any included whitegoods.
If you don’t know how a built-in appliance operates, ask for a demonstration then and there. “Untested” becomes “your issue” very quickly once keys are handed over.
3. 3. Verify Agreed-Upon Repairs and Cleanliness
Repairs aren’t “done” because someone says they are. They’re done when the item works and the finish is acceptable.
Bring the contract, addendum, emails, and any list of agreed works. Then match each promise to the actual result. If a leaking tap was meant to be fixed, test it. If a damaged wall was to be patched, inspect the surface in good light. If the agreement required a professional clean, judge the outcome, not the effort.
Check the promise, not the effort
A common miss is accepting work that looks touched up but isn’t properly resolved. A painter can cover a stain without fixing the moisture issue. A handyman can tighten a handle while leaving the door out of alignment. A “clean” kitchen can still have grease in the rangehood filters and crumbs in drawer runners.
Photos help, but wording matters too. When you note an issue, describe the condition plainly. “Laundry tap still drips after running.” “Steam clean promised, carpet still stained near bedroom robe.” “Rubbish left behind shed.” Facts are harder to argue with than frustration.
This is also where moving and cleaning overlap. If you’re handling a rental handover or comparing standards between properties, Emmanuel Transport’s guide to an end of lease cleaning checklist is useful for spotting the areas people forget, especially inside cupboards, wet areas, and appliance surrounds.
The visual inventory below is a good reminder to cross-check what was promised against what’s in front of you.

For a second opinion on cleaning scope, expert cleaning advice from All Well is a decent comparison point, especially if someone is trying to pass off a surface tidy as a full clean.
5. 5. Document Everything Your Ultimate Proof
A final walkthrough can go sideways fast. The agent says a mark was not there before. The landlord insists an appliance worked last week. The seller agrees to fix something, then the conversation turns vague once keys change hands. Good records stop that drift.
Your job here is to leave with evidence that shows condition, location, and timing. If a dispute starts later, memory will not carry much weight. A dated set of photos, short videos, and written notes usually will.
Build a photo record that holds up
Start with wide shots of each room from the doorway and opposite corners. Then take medium shots of walls, floors, ceilings, windows, and built-ins. Finish with close-ups of anything damaged, dirty, incomplete, or missing.
That sequence matters. A close-up of a cracked tile is helpful. A close-up plus a wider shot showing it is beside the ensuite vanity is much harder to argue with.
Record normal condition too. Photograph clean benchtops, intact paint, empty cupboards, clear hallways, garage floors, and any area your removalists will pass through. That protects you if someone later claims damage happened during the move. It also helps you brief your movers properly. If you are lining up utility transfers, address updates, and handover timing on the same day, keep your paperwork in one place with a moving house change of address checklist.
Use short videos for faults that still photos cannot show well, such as:
- a lock that sticks
- a garage door that hesitates
- a tap with poor pressure
- an exhaust fan that makes noise but barely pulls air
- a window that will not stay open
- a blind that catches halfway
Label files while you are still on site
Do not leave yourself with 140 unnamed photos to sort out that night.
Use plain file names or notes such as “Bed 2 west wall scuff”, “Laundry tap drip after shut-off”, or “Garage remote missing”. If your phone allows captions, add them immediately. If not, keep a running note in your notes app with the image number and a short description.
Then send a batch of the key images to yourself before you leave. If there is a problem that needs action, email the relevant photos to the agent or landlord the same day so there is a timestamped record.
Write notes like someone else may read them later
Keep the wording factual and boring. That is what makes it useful.
Say “scratch to timber floor near balcony door, about 20 cm” instead of “floor badly damaged.” Say “oven light not working during test” instead of “kitchen not properly maintained.” Clear descriptions give the other side less room to reinterpret what you found.
I also recommend noting who was present and what was said. For example: “Agent present at 3:15 pm. Agreed to arrange missing mailbox key.” If they make a promise verbally, ask for confirmation on email or text before everyone walks away.
Use a simple script if someone pushes back
You do not need an argument. You need a record.
Try: “I’m noting this now so there’s no confusion after handover. Can you confirm whether this will be fixed, credited, or left as-is?”
If the answer is vague, pin it down. “Please send that in writing today, including timing.”
If you have removalists booked, say so plainly. “My movers are scheduled based on today’s handover condition. I need a clear answer now if access, loading, or item condition will change.” That turns the walkthrough from a casual inspection into what it really is: a decision point that affects your moving day.
Strong documentation does two jobs. It protects your position in a dispute, and it gives your moving team a clearer brief on access paths, fragile areas, and any issue that could slow the job.
6. 6. Record Crucial Utility Meter Readings
A handover can look clean and still create a billing mess. If the opening meter readings are missing or tied to the wrong meter, you can end up paying for someone else’s usage or wasting time disputing a first bill after the move.
Do this before any furniture comes in. Once boxes are stacked in the garage, the hallway is blocked, or the meter room has been forgotten, this simple job becomes harder than it should be.
Locate the electricity, gas, and water meters that apply to the property. In apartments and townhouse complexes, confirm which meter belongs to your lot before you photograph anything. Shared meter rooms, sub-metering, and faded labels cause problems because people guess. Do not guess.
Take four photos for each meter:
- The full meter face so the reading is readable
- The meter number or serial number if it appears separately
- A wider location shot showing where the meter is installed
- Any access issue or damage such as a broken cover, locked cabinet, or missing label
If the agent is with you, use that time properly. Ask: “Can you confirm this is the meter for this property, and can you send that confirmation in writing with today’s handover notes?” That sentence is plain, but it closes off a common argument later.
This step also affects your moving day timing. If your removalist is due to arrive and the power account cannot be set up because the meter details are unclear, you are solving admin problems while a truck is waiting. I tell clients to keep the meter photos with the rest of their moving house change-of-address checklist so utility setup, mail redirects, and handover records stay in one place.
One more practical point. If the meter is behind a locked door, in a basement cage, or inaccessible during the walkthrough, note that immediately and send a message before you leave: “I could not access the electricity and water meters at handover. Please provide confirmed opening readings, meter numbers, and access details today.” That gives you a timestamped record if a bill starts from the wrong figure.
Five minutes here can save weeks of follow-up.
6. 6. Record Crucial Utility Meter Readings
This takes minutes and can spare you a tedious billing dispute later.
Before any furniture arrives, locate the electricity, gas, and water meters that apply to the property. Photograph each meter so the reading and meter number are both visible. If there’s a shared meter arrangement or apartment sub-metering, confirm which meter belongs to your lot. Don’t guess.
What to photograph before anyone unloads a box
Australian housing mobility remains high, with the ABS reporting that about 1 in 10 people changed address in the previous year in the latest Census release, and that matters because missed readings create exactly the sort of utility dispute that follows a move from one household to the next (Australian walkthrough discussion). Utility costs also remain a material source of friction if opening readings aren’t captured and passed on properly.
Take these shots in one go:
- The full meter face: Make the digits readable.
- The meter identifier: Serial or meter number, if shown separately.
- The location context: One wider photo so you can prove where the meter was.
- Any damaged covers or access issues: Especially if a box is broken or difficult to open.
If the agent knows where the meters are, ask before the appointment starts. In apartment buildings, meter rooms may be locked or grouped together, and you don’t want to burn half your inspection time searching for them. Emmanuel Transport’s moving house checklist for change of address tasks is handy here because utility transfers, mail redirection, and service updates work best when they’re tied to actual move dates and opening readings.
A clear meter photo also helps if the first account looks wrong. Without it, you’re relying on someone else’s records.
7. 7. Finalise Your Moving Day Logistics
The walkthrough isn’t only about condition. It’s also your site visit.
A move can unravel because the truck can’t park where you assumed, the lift booking was never made, the loading dock needs prior approval, or the hallway turn is too tight for your fridge. These aren’t removalist problems alone. They’re planning problems, and the walkthrough is the best moment to catch them while you’re physically at the property.
Apartment and strata checks people forget
This matters even more in Australian strata buildings. Mainstream walkthrough lists usually focus on detached-home issues, but apartment moves involve building rules and common-property responsibilities that generic checklists often ignore. Australian consumer guidance on strata living highlights those responsibilities, and that gap is especially relevant because apartment living is a large and growing share of households, particularly in capital cities such as Perth (strata and apartment walkthrough gap).
Use the inspection to confirm practical access details with the building or agent:
- Lift access: Is there a service lift, a booking requirement, or protective padding rules?
- Loading area: Is there a dock, a bay, a height limit, or a time restriction?
- Stair and corridor width: Can bulky furniture clear corners and fire doors?
- Common-property condition: Are there existing scuffs, cracks, or dents you should photograph before move-in?
- Key handover details: How many fobs, remotes, or swipe cards are needed for movers to get through?
Here’s the sort of documentation that helps during access planning and damage prevention.

If you’re using a Perth removalist such as Emmanuel Transport, send these photos and details ahead of time. Their moving day checklist is a practical prompt for access, timing, and handover details that should be confirmed before the truck rolls out.
Shared-property moves fail on small admin details. Lift booking, dock access, fob collection, mailbox keys, bin room rules. Check them before moving day, not while the truck is idling outside.
8. 8. Prepare Your Agent Communication Script
If you find a problem, your tone matters almost as much as the problem itself.
People lose their advantage when they get flustered, vague, or apologetic. You don’t need to be aggressive. You do need to be direct. Raise the issue on site, state what you observed, connect it to the agreement if relevant, and ask what happens next. Then follow up in writing the same day.
Simple scripts that keep things moving
Use short, factual wording. Here are scripts that work.
“I’ve tested the air-conditioner and it isn’t cooling. This was expected to be in working order at handover. Please note this now and confirm the next step before settlement.”
“The contract lists the dishwasher and garage remote as inclusions. The dishwasher is present, but the remote isn’t. I need this recorded and addressed today.”
“This area wasn’t cleaned to the standard agreed. I’ve taken photos of the kitchen drawers, bathroom grout, and rubbish left in storage. Please confirm whether this will be rectified before keys are released.”
If the issue affects your move, say that plainly too. “My removalist needs confirmed lift access and loading instructions.” “I can’t schedule delivery until the garage remote issue is resolved.” “I need written confirmation today so I can finalise tomorrow’s move.”
Keep your notes organised around three points:
- What you found: One sentence, factual only.
- Why it matters: Contract item, working order, cleanliness, or access.
- What you want next: Repair, clarification, written undertaking, or escalation to solicitor/property manager.
Don’t leave with a verbal “we’ll sort it out” and no written record. Send the summary email before you move on to the next task.
Final Walkthrough: 8-Point Checklist Comparison
A final walkthrough works best when you treat it as a decision tool, not a formality. The table below shows where each step asks for more time, more attention, or tighter coordination with your agent, landlord, or removalist. That matters on moving day, because a missing remote, an untested appliance, or unclear lift access can delay a truck booking just as fast as a repair issue.
| Step | Effort Level 🔄 | What You Need ⚡ | What It Helps You Confirm ⭐📊 | Best Fit 💡 | Main Benefit ⭐ |
|---|---|---|---|---|---|
| 1. Conduct a Systematic Room-by-Room Inspection | Moderate 🔄, steady and methodical | Time, phone, checklist ⚡ | Visible defects, damage, and anything left behind 📊 | Any final walkthrough, especially larger properties 💡 | Keeps the inspection consistent and reduces missed items ⭐ |
| 2. Test Every System and Appliance | Moderate to High 🔄, some hands-on checking required | Phone, charger, basic patience to run systems properly ⚡ | Whether appliances, lights, plumbing, heating, cooling, and remotes actually work 📊 | Homes with included appliances, rentals, and pre-settlement checks 💡 | Cuts the risk of finding faults after keys are released ⭐ |
| 3. Verify Agreed-Upon Repairs and Cleanliness | Low to Moderate 🔄, tied to the written agreement | Contract, condition report, photos ⚡ | Whether promised repairs were done and cleaning meets the agreed standard 📊 | Properties with special conditions, repair promises, or end-of-lease handover 💡 | Gives you a clear basis for raising issues on the spot ⭐ |
| 4. Confirm All Inclusions and Exclusions | Low 🔄, checklist-based | Contract details, reference photos ⚡ | Whether fixtures, appliances, fobs, remotes, and other listed items are present or removed as agreed 📊 | Sales and rentals where specific items are named in writing 💡 | Prevents handover disputes about what stays with the property ⭐ |
| 5. Document Everything: Your Ultimate Proof | Low 🔄, but it requires discipline | Charged phone, storage space, time to label photos ⚡ | A dated visual record of condition, defects, meter reads, and access points 📊 | Every walkthrough, especially if issues are already in play 💡 | Gives you evidence if the discussion turns into a dispute ⭐ |
| 6. Record Utility Meter Readings | Low 🔄, though meters can be awkward to find | Phone camera, a few extra minutes ⚡ | Opening readings for electricity, gas, and water so billing starts in the right place 📊 | Move-ins, settlement day, end-of-lease exits 💡 | Helps prevent charges from a prior occupant landing on your account ⭐ |
| 7. Finalise Your Moving Day Logistics | Moderate 🔄, practical planning matters | Photos, measurements, building rules, contact details for movers ⚡ | Whether access routes, lifts, loading zones, and timing work for the actual move 📊 | Apartments, strata buildings, tight driveways, and larger furniture moves 💡 | Helps your removalist, including a company like Emmanuel Transport, arrive with the right plan instead of improvising at the kerb ⭐ |
| 8. Prepare Your Agent Communication Script | Low 🔄, simple drafting and follow-up | Notes app or email draft, clear wording ⚡ | How quickly issues can be recorded, acknowledged, and pushed toward action 📊 | Any walkthrough where you may need repairs, clarification, or written undertakings 💡 | Keeps conversations factual and creates a written trail the same day ⭐ |
Use the table to decide where to slow down. Steps 2, 3, 7, and 8 usually carry the biggest practical consequences because they affect cost, timing, and access, not just paperwork.
That last point gets missed often. A walkthrough is tied directly to the move itself. If the lift booking is wrong, the driveway is blocked, the garage remote is missing, or the loading dock rules were never confirmed, your removalist wears the delay first and you pay for it next. That is why logistics sit beside inspections in this checklist, not as an afterthought.
The same applies to communication. If you find a problem, the value is not just spotting it. The value is being ready to state it clearly, connect it to the agreement, and ask for a next step while everyone is still on site.
From Checklist to Keys in Hand
A thorough final walkthrough checklist does more than confirm taps run and lights switch on. It protects your position at the exact point where responsibility is about to shift. Once keys are handed over, small uncertainties become your admin problem, your repair problem, or your moving day delay. That’s why diligence here isn’t fussy. It’s practical.
The strongest walkthroughs have a clear structure. You inspect each room in a fixed order. You test the systems that are most likely to cause arguments later. You verify agreed repairs against the written agreement, not against anyone’s reassurance. You confirm inclusions, record utility readings, and create a dated photo trail that you can use if there’s a dispute. When you’re moving into an apartment or strata property, you also extend the checklist beyond the front door and into the shared spaces that affect access, liability, and timing.
That last point matters more than many people expect. Generic advice often focuses on detached homes, but real moves get held up by loading dock rules, missing fobs, unbooked lifts, narrow corridors, and undocumented scuffs in common areas. If you catch those issues during the walkthrough, you can adjust the moving plan. If you catch them when the truck arrives, you’re negotiating under pressure.
There’s also value in being calm and scripted. A lot of buyers and tenants know something is wrong but struggle to communicate it cleanly. The best approach is simple. State what you observed. Tie it to the contract or expected condition. Ask for a written next step. That keeps the conversation professional and gives your solicitor, property manager, or agent something concrete to act on.
Handled properly, the final walkthrough is the handover checkpoint that makes the rest of the move smoother. You’re not trying to win an argument. You’re making sure the property, the paperwork, and the logistics line up before your belongings arrive. That’s how you turn a stressful transition into a controlled one.
If you’ve done the inspection properly and you’ve confirmed access details, the rest becomes straightforward coordination. At that stage, a removalist like Emmanuel Transport can work from clear information about building access, timing, and handling requirements rather than surprises on the day.
If you want the move itself to run as smoothly as the paperwork, Emmanuel Transport is one Perth option to line up early. Their team handles local residential and commercial moves, and it helps to brief them with your final walkthrough notes, access photos, lift requirements, and any building restrictions before moving day.
