When it comes to moving, keeping your furniture safe is all about a smart, systematic approach. It boils down to three key things: taking larger items apart, wrapping everything properly with moving blankets and plastic, and loading the truck strategically. Getting these steps right is the secret to making sure your valuables arrive without the usual battle scars—scratches, dents, or broken legs.
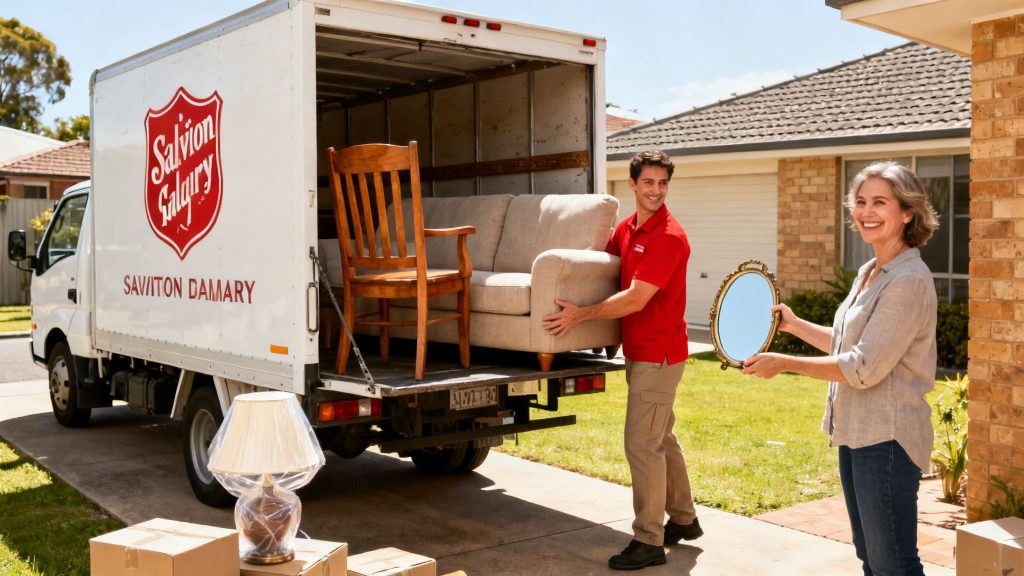
Your Guide to a Damage-Free Furniture Move
They say moving house is one of life’s most stressful moments, and a huge chunk of that stress comes from the fear of your things getting damaged. Your furniture isn't just stuff; it's a big investment in your comfort and holds a lot of memories. The idea of your favourite armchair getting ripped or a family heirloom getting a massive scratch is enough to keep anyone up at night.
This guide is here to take the stress out of the equation. We’ll walk you through a proven, professional plan to protect your furniture just like the experts do. The aim is to swap that worry for confidence, so you know every single piece is ready for the trip ahead.
Why Proper Protection Matters More Than You Think
The value of what we keep in our homes is climbing. The Australian home furniture market alone was valued at a whopping USD 17.0 billion and is only expected to grow. This means we're moving furniture that's often more modern, more expensive, and sometimes more delicate than ever before.
And consider this: the average Australian moves about 13 times in their life. That's a lot of opportunities for things to go wrong. Making sure your furniture is properly protected isn't just a good idea; it's a financial necessity.
A methodical approach doesn't just save your furniture—it saves your sanity. A little bit of smart preparation can help you dodge the most common moving day headaches.
The secret to a successful move isn’t just about brute force; it’s about strategy. Taking a few extra minutes to wrap a table leg or secure a moving blanket can save you from the headache and expense of repairs down the line.
We're going to cover everything you need to know, from getting the right supplies together to placing that last item perfectly in the truck. For even more expert advice, check out these furniture moving tips to really build your confidence. You’ll learn how to handle everything, from that bulky sofa to a fragile glass cabinet, ensuring it all arrives at your new home in one piece.
Choosing the Right Supplies for Total Protection
The real secret to keeping your furniture pristine during a move? It all comes down to your toolkit. I've seen it time and time again—people thinking a few old towels and some leftover supermarket boxes will do the trick. Unfortunately, that's a fast track to scratches, dings, and disappointment.
If you want to do this properly, you need to think like a professional removalist. That means investing in purpose-built supplies designed to handle the bumps, scrapes, and shifts that happen during transit. This is honestly the single most important step you can take towards a damage-free move.
Building Your Furniture Protection Toolkit
Before you even think about wrapping a single table leg, you need to gather the right gear. Here's what the pros use and why.
Your Furniture Protection Toolkit
Having the right materials on hand makes all the difference. Here’s a quick rundown of the essentials.
| Supply Item | Primary Use | Pro Tip |
|---|---|---|
| Moving Blankets | Provide a thick, padded barrier against scratches, dents, and impacts for large items like tables, dressers, and bedheads. | Don't skimp here. Get the thick, woven kind, not thin felt ones. You want at least one blanket for every major piece of furniture. |
| Stretch Wrap | Secures moving blankets tightly to furniture without leaving sticky tape residue. Also protects upholstery from dirt and moisture. | Use it generously! A tight wrap is a secure wrap. It's fantastic for keeping drawers and cabinet doors shut during the move. |
| Bubble Cushioning | Offers essential shock absorption for fragile and awkwardly shaped items like chair legs, mirror frames, and lamps. | For really delicate pieces, use a double layer. The air pockets are your best friends when it comes to absorbing vibrations and bumps. |
| Corrugated Cardboard Sheets | Add a rigid layer of protection over large, flat surfaces like glass tabletops, artwork, and TV screens. | Tape these sheets over a blanket or bubble wrap layer to create a tough outer shell that resists punctures and pressure. |
| Packing Tape | Secures cardboard, bubble cushioning, and other protective layers in place. | Get a good quality, strong adhesive tape. A handheld dispenser will save you a ton of time and frustration. Trust me on this one. |
Wrapping up the essentials, remember the goal isn't just to cover your furniture. You're building a protective cocoon that can handle the realities of being loaded, transported, and unloaded.
Sourcing Your Supplies Without Breaking the Bank
Getting professional-grade materials doesn't have to cost a fortune. You can often find everything you need at a local storage facility or even from removalist companies that sell moving packs directly to the public. Hardware stores are another solid option.
So, how much do you need? For a typical three-bedroom home, I’d recommend planning for 10-12 moving blankets, a large roll of stretch wrap, at least a 50-metre roll of bubble cushioning, and several rolls of quality packing tape.
A little piece of advice from experience: always buy slightly more than you think you’ll need. Running out of supplies halfway through wrapping your favourite antique dresser is a headache you can easily avoid with a bit of planning.
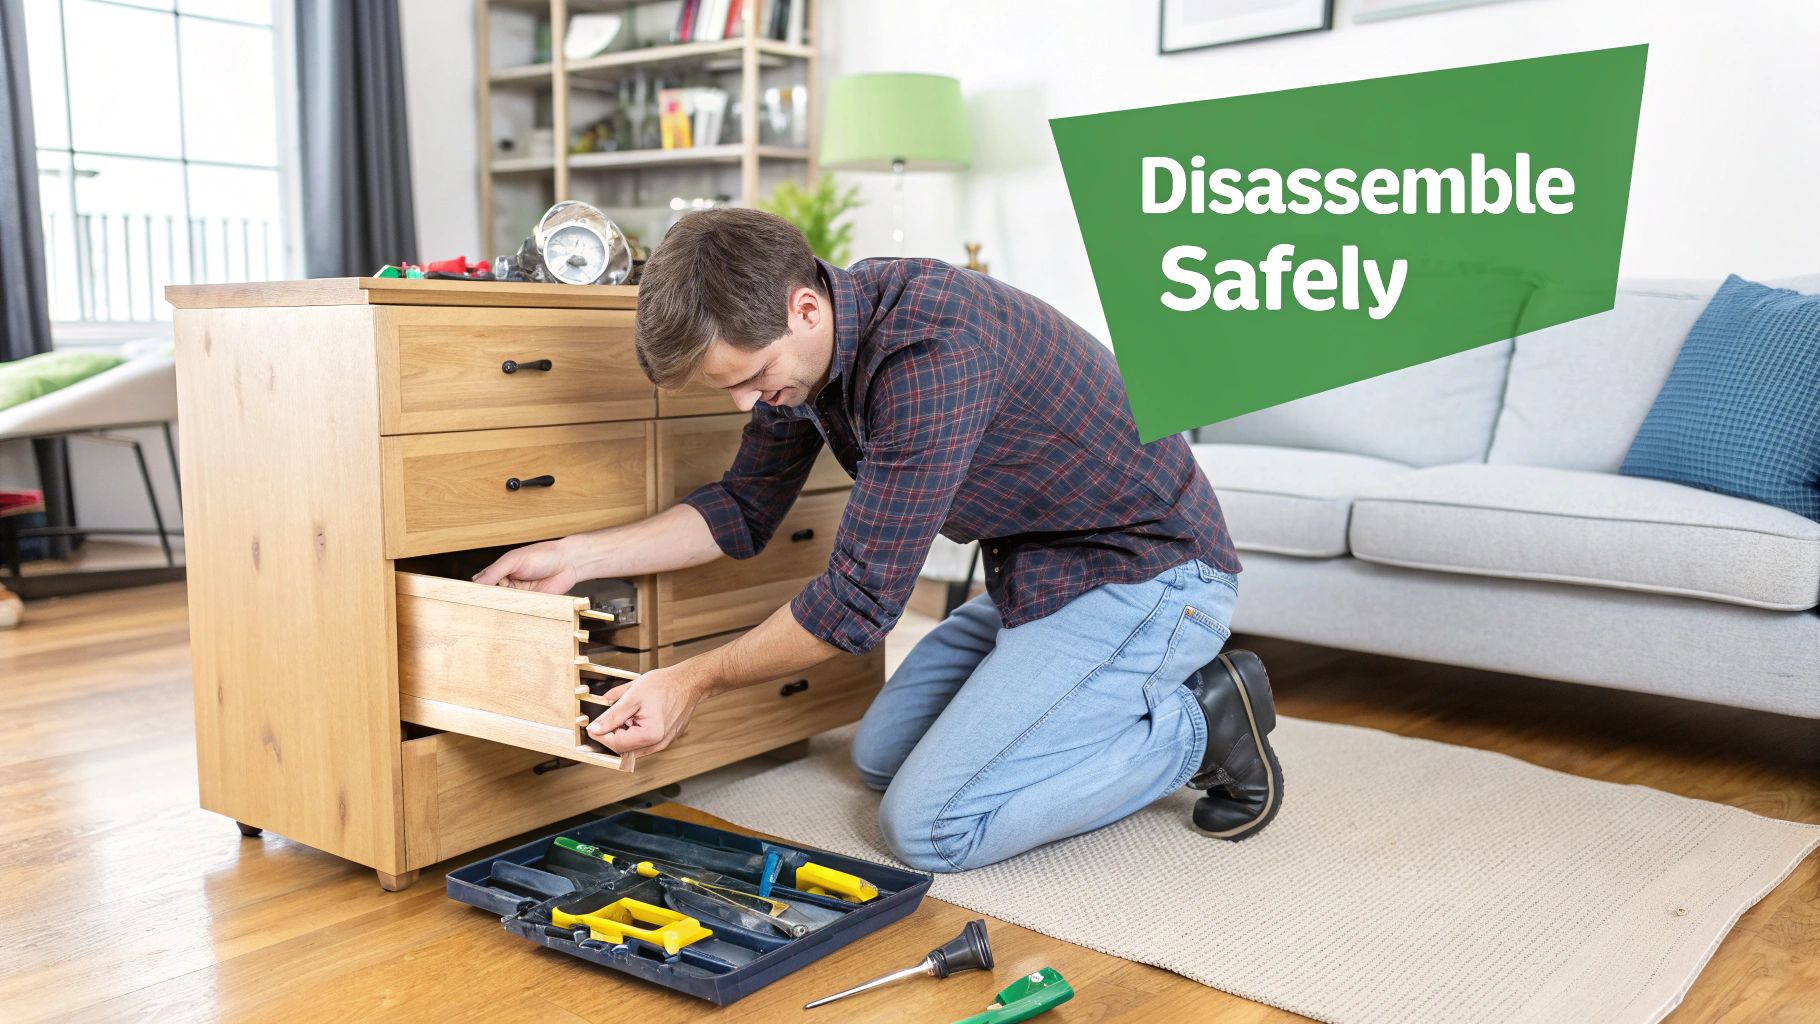
When and How to Disassemble Your Furniture
We’ve all seen it: that classic moving day struggle of trying to pivot a massive couch through a doorway that's just a bit too small. It’s the quickest way to end up with scuffed walls, a scratched door frame, and a damaged piece of furniture. A far better approach is to work smarter, not harder, by strategically taking things apart.
Disassembling bulky items isn't just about making them fit through tight spaces. It breaks them down into lighter, less awkward components that are much easier and safer for one or two people to carry. That enormous dining table becomes a manageable tabletop and a bundle of legs. It’s a game-changer.
Identifying What to Take Apart
Before you grab the Allen key, take a moment to assess what actually needs disassembling. You don't want to start pulling apart a priceless antique held together by old glue and a prayer. A good rule of thumb? If it came flat-packed and you had to build it, you can almost certainly take it apart again.
Look for these common culprits that are perfect for disassembly:
- Bed Frames: Taking off the headboard and footboard makes navigating stairs and tight corners infinitely easier.
- Dining Tables: Almost always, the legs can come off. Don't forget to remove any extension leaves and wrap them separately.
- Bookcases and Shelving Units: Pop out all the adjustable shelves. This instantly reduces the weight and stops them from sliding out and causing damage mid-move.
- Modular Sofas: Sectional couches are literally designed to come apart. This is a huge win, turning one giant piece into several manageable ones.
This is more important than ever. Recent Australian search data shows a huge demand for large furniture, with 60,500 monthly searches for queen bed frames and 14,800 for three-seater sofas. These are exactly the kinds of popular, bulky pieces that demand careful disassembly. You can read more about the furniture trends shaping Australian homes to see why this skill is so crucial.
The Secret to Stress-Free Reassembly
Getting furniture apart is only half the job. The real test comes at your new place when you have to put it all back together. The key to avoiding a massive headache is to be incredibly organised from the moment you remove the first screw.
Forget just tossing all the hardware into a random container. The single best thing you can do is keep all the screws and bolts with the specific item they belong to. This one habit will save you from a world of pain later.
Follow this foolproof system, and you’ll thank yourself later:
- As you disassemble an item, put all its screws, bolts, washers, and other bits into a small, sealable plastic bag.
- Grab a permanent marker and label the bag clearly. Be specific: "Bolts for Dining Table Legs" or "Bookcase Shelf Pins."
- Use strong packing tape to securely attach the bag to the largest part of that same piece of furniture—like the underside of the tabletop or the back of the headboard.
When it’s time to reassemble, everything you need is right there. No frantic searching, no guessing games. This simple, methodical approach turns a potentially chaotic chore into a smooth, straightforward task, helping you settle into your new home faster.
Getting Hands-On: Professional Wrapping and Padding Techniques
With your furniture taken apart and your supplies laid out, you’ve reached the most important part of the job: protecting each piece. This isn't just about throwing a blanket over something; it's about creating a tough, road-ready shield that can handle the bumps and scrapes of a move.
Think of it this way: you wouldn't protect a glass tabletop the same way you'd protect a leather couch. Every material has its weak spot. Wood gets scratched, fabric can be ripped or stained, and glass, well, we all know what happens to glass. Nailing how to protect furniture when moving really comes down to using the right technique for each specific item.
How to Wrap Wooden Furniture
When you're dealing with solid pieces like dressers, tables, and bookcases, your biggest enemies are scratches and dings, especially on the corners. The whole point is to create a soft, thick cushion that can absorb any knocks along the way.
Always start with the most vulnerable spots first. Before you do anything else, grab some foam corner protectors or even just a few layers of bubble cushioning and secure them to every sharp edge. Trust me, this one small step prevents the most common kind of damage I see.
Once the corners are safe, wrap the entire piece in a thick moving blanket. Make sure you don't leave any gaps and overlap the blanket if you need to. Then, use stretch wrap to pull the blanket tight against the furniture. I always start from the bottom and work my way up in overlapping layers, which creates a really secure, padded cocoon.
One of the biggest mistakes people make is slapping packing tape directly onto a wood finish. The adhesive can pull the varnish right off or leave a sticky mess that’s a nightmare to clean. Stick to stretch wrap for securing blankets—it only sticks to itself.
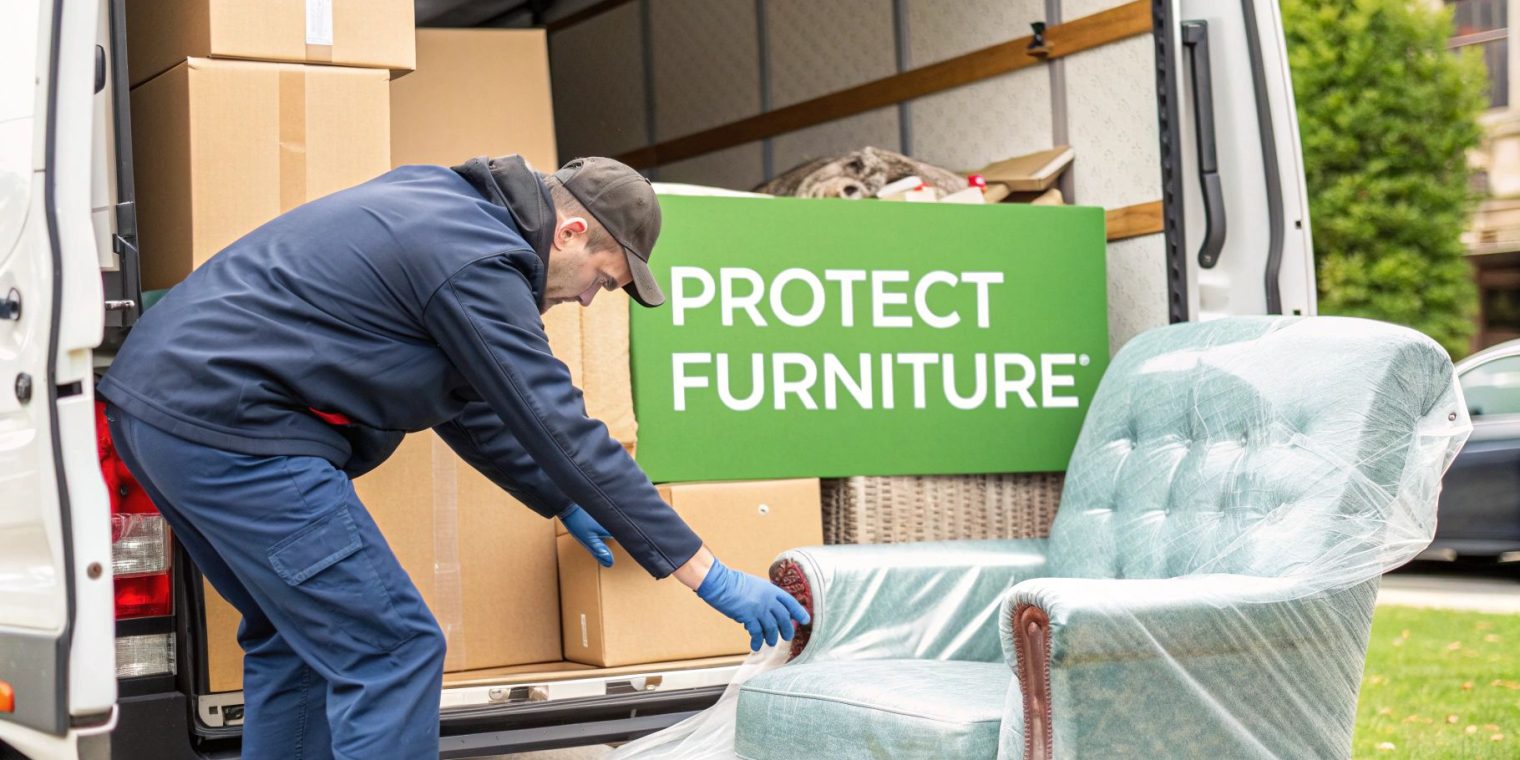
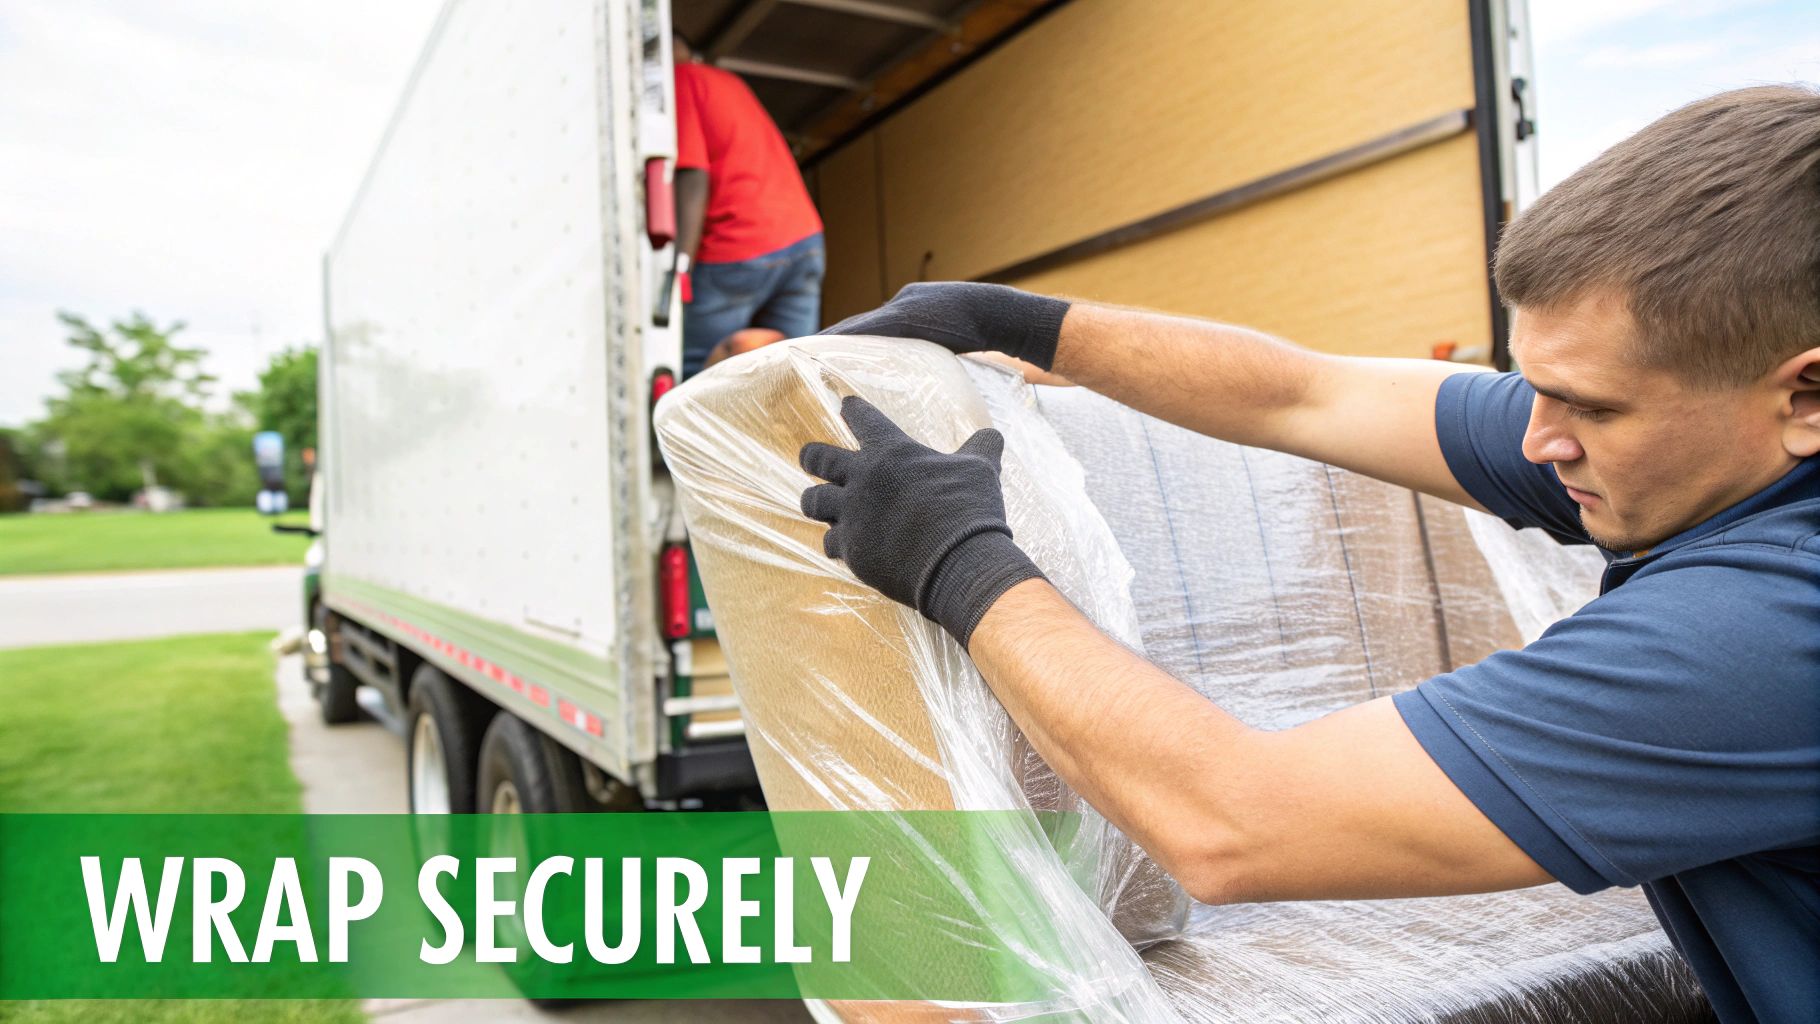
Protecting Your Upholstered and Fabric Items
For your sofas, armchairs, and mattresses, the main worries are completely different. You’re fighting against dirt, moisture, and tears. Fabric is a magnet for dust and can easily catch on a sharp corner inside the truck.
This is where stretch wrap is your best friend. Before a blanket even touches the fabric, wrap the entire piece directly in several layers of stretch wrap. This creates a solid barrier against grime and even a bit of rain if you’re caught loading in bad weather.
Only after it’s completely sealed in plastic should you add a moving blanket for extra padding. This two-layer approach is the best way to make sure your upholstery arrives at your new home clean and tear-free. For a closer look at these methods, our guide on how to https://emmanueltransport.net.au/furniture-protection-for-moving/ goes into even more detail.
This image breaks down the essential workflow for getting your furniture ready.
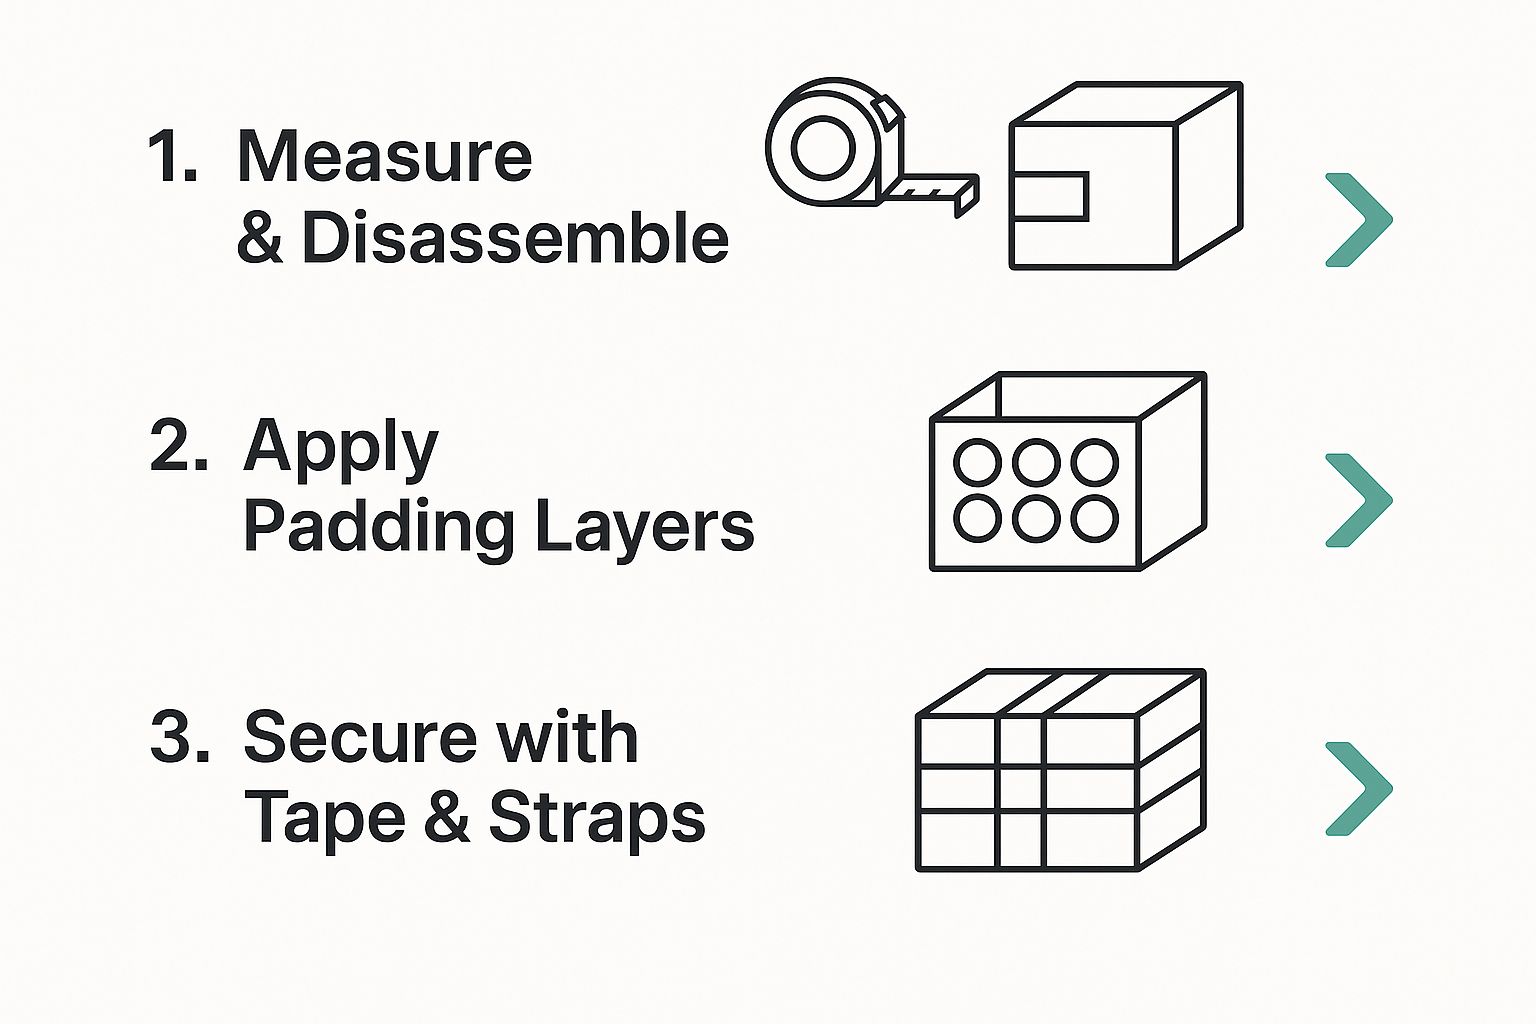
As you can see, following a clear process—from disassembly to the final wrap—is what really keeps your furniture safe.
Techniques for Glass, Mirrors, and Other Fragile Surfaces
Glass tabletops, large mirrors, and delicate cabinet doors need the most attention. With these, the game is all about preventing shatters and absorbing vibrations from the road.
First, take some masking tape and make a large 'X' or a star pattern across the entire glass surface. This won't stop it from breaking if there's a major impact, but it will help hold the pieces together if the worst happens, which is a huge safety win.
Next, you're going to create a protective "sandwich."
- Wrap the whole thing generously in bubble cushioning.
- Find a large sheet of corrugated cardboard for each flat side and place them on the front and back.
- Use packing tape to secure the entire bundle tightly.
This gives you a soft inner cushion and a hard outer shell. If you're tackling a bigger move, this comprehensive long-distance packing guide offers even more specialised tricks for high-risk items. And always remember the golden rule: carry and load these fragile pieces on their edge, never flat.
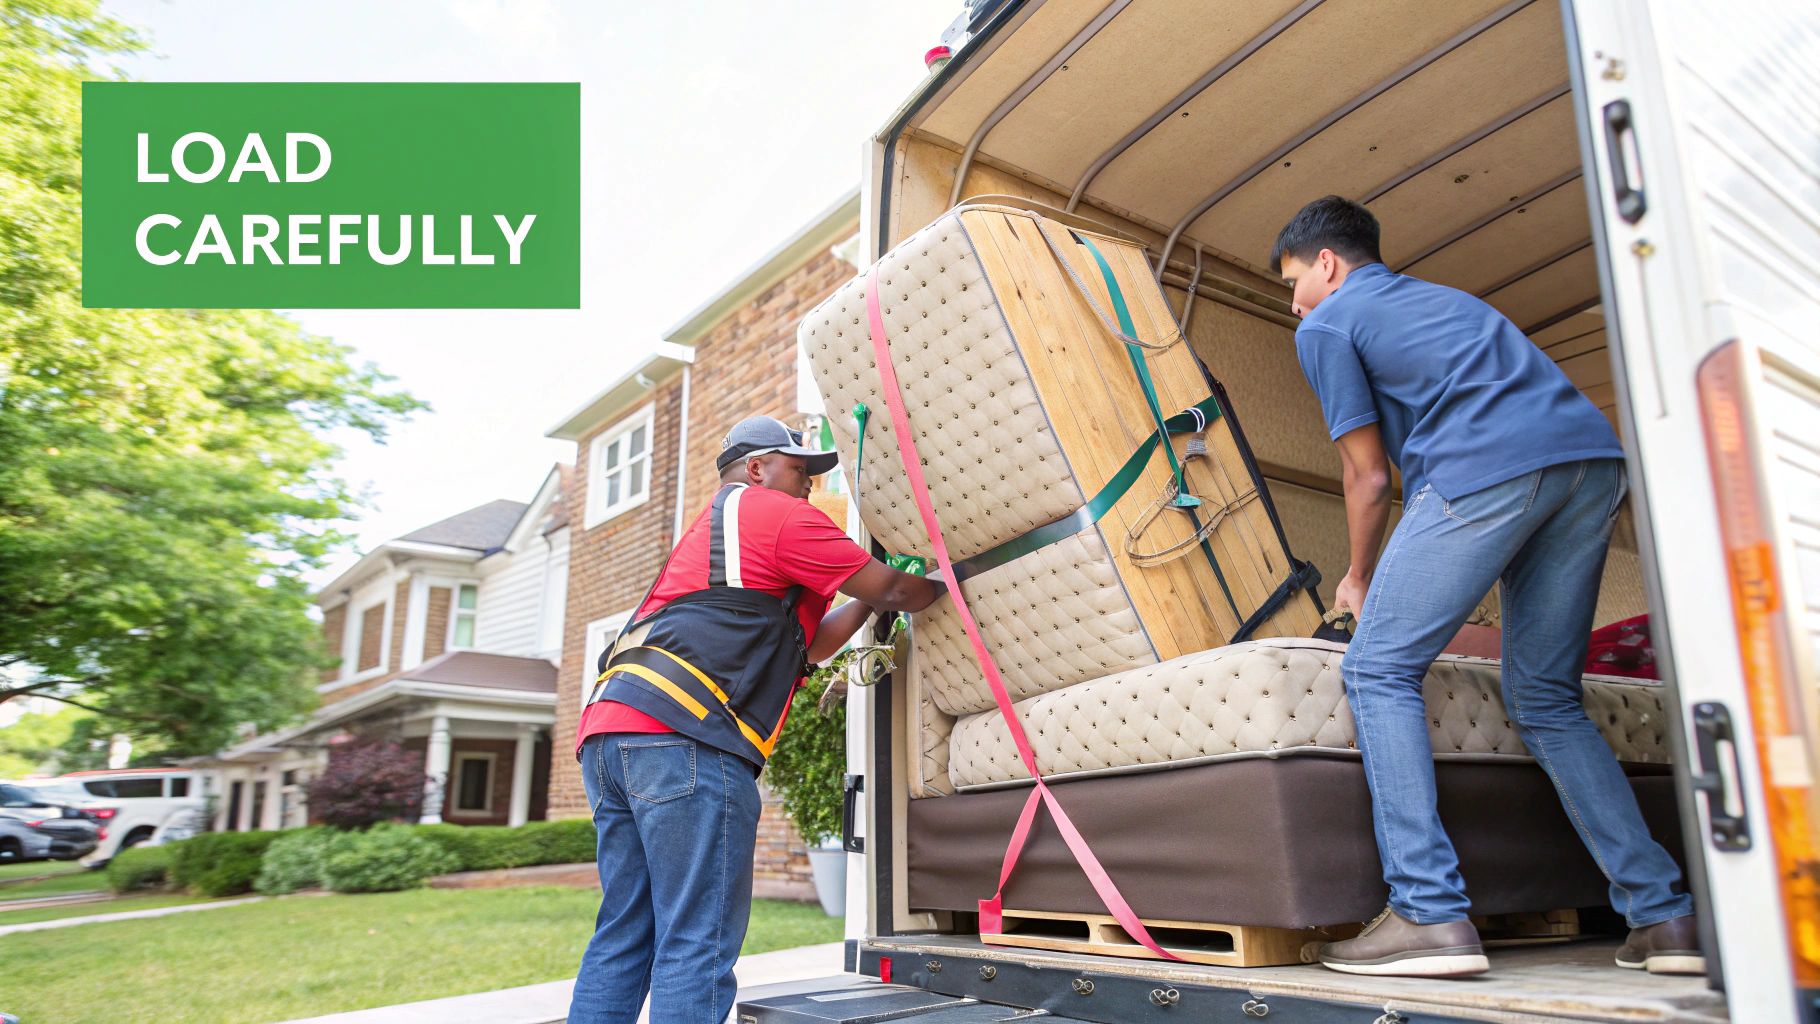
How to Load the Moving Truck Strategically
Even the most perfectly wrapped furniture is at risk if it’s just tossed into the back of a truck. How you load everything isn’t just about fitting it all in; it’s a science of weight distribution and stability that makes all the difference in protecting your furniture during the move. A well-loaded truck stops your belongings from shifting, rubbing, or crashing into each other on the road.
The secret is to build sturdy, interlocking tiers, almost like you're playing a life-sized game of Tetris. You want to create solid walls with your heaviest items and then fill in the gaps with lighter boxes, making sure nothing has room to wobble around. This methodical approach is what separates a smooth ride from a chaotic one filled with the sound of your precious items getting damaged.
Building a Secure Foundation
First things first: your heaviest and largest items always go in first. We’re talking about the big stuff—refrigerators, washing machines, and solid wooden dressers. These need to be positioned right at the front of the truck, snug against the cab wall. This creates a solid, stable base and keeps the bulk of the weight over or just in front of the truck's axles, which is crucial for safe driving and balance.
Arrange these heavy pieces to form the bottom layer of your first "wall." Get them in as tight as you can, leaving as little wiggle room between them as possible.
The 'wall-building' technique is non-negotiable for professional removalists. Each vertical tier you create should be secured with ratchet straps before you even start the next one. This locks everything in place and prevents a domino effect if the truck stops suddenly.
Placing Long and Awkward Items
Once you've got that heavy base sorted, it's time to tackle the long, awkward pieces. Things like sofas, mattresses, and box springs should be loaded standing up along the sides of the truck. Laying a sofa flat on its feet just wastes valuable floor space and makes it unstable. Standing it on its end (on top of a moving blanket, of course) is a much smarter use of space.
This technique helps you use the full height of the truck and creates long, stable walls that you can pack lighter things against.
- Mattresses and Box Springs: Slide these in along the sides. They make great padding for other items.
- Sofas and Loveseats: Stand them on their end, making sure the fabric is well-protected with plastic wrap and blankets.
- Headboards and Large Mirrors: These should also be placed vertically against the truck walls, cushioned between mattresses or other soft furnishings.
This approach is becoming more vital as Australians increasingly relocate. The recent 10.5% jump in people moving from capital cities to regional areas often involves transporting higher-value furniture over longer distances. This trend underscores the need for professional loading skills to protect valuable pieces during these extended journeys. Discover more insights about Australia's regional migration trends and why these skills matter.
Filling the Gaps and Finalising the Load
With your main furniture in place, the final job is to fill every last bit of space with your boxes and smaller items. Start with the heaviest boxes on the floor level and work your way up with progressively lighter ones. This is just common sense—it stops your fragile kitchenware from being crushed under a box of heavy books.
Wedge smaller boxes and soft items like bags of linen into any gaps to create a tight, unmoving load. It’s also a great idea to place a layer of corrugated cardboard between any two wooden surfaces to stop them from scratching each other from the vibration of the drive.
Finally, think about your arrival. The items you'll need first—like the kettle, some bedding, and toiletries—should be packed right at the back of the truck so they’re the first things you can grab when you get there.
Common Furniture Moving Questions Answered
Even with the best game plan, you're bound to run into a few tricky situations when moving furniture. After years in the business, we've seen it all. Here are our quick-fire answers to the questions that pop up time and time again.
How Can I Protect Wooden Furniture From Scratches?
When it comes to wood, your best defence is layering. Think of it like dressing for cold weather. Start by wrapping the entire piece in a thick, padded moving blanket. Don't be shy with it – make sure you give extra attention to the corners and edges, as these are the most likely spots to get dinged.
Once it's padded, grab a roll of plastic stretch wrap. Wind it around the blanketed furniture to hold everything snugly in place. This stuff is gold because it only sticks to itself, meaning you get a tight, secure wrap without any sticky residue touching your wood's finish. For an extra buffer against punctures or bumps, you can even sandwich a layer of corrugated cardboard between the blanket and the wrap.
Is It Okay to Leave Clothes in Dresser Drawers?
It's tempting, I get it. Seems like a great way to save a few boxes. But trust me, it's a bad idea. A full dresser is a dangerously heavy dresser. All that extra weight puts an incredible amount of strain on the frame, joints, and drawer runners, especially when it's being tipped on its side or navigated down a flight of stairs.
The risk of someone dropping it or the furniture itself breaking under the load just isn't worth it. The best and safest bet is always to pack clothes and other items into separate boxes. If you absolutely have to leave very light items like sheets or towels inside, at least make sure to wrap the entire dresser with stretch wrap to keep the drawers from flying open mid-move.
What Is the Best Way to Move a Mirror or Glass Tabletop?
Large, flat pieces of glass are fragile, and the key is to manage the risk. First things first, take some masking tape and make a large 'X' or a starburst pattern across the entire glass surface. This simple trick won't magically prevent a crack, but if the worst happens, it will hold the broken shards together, which is a massive safety win.
Next, you'll want to create a protective sandwich for it.
- Wrap the whole thing in several layers of bubble cushioning.
- Cut two large pieces of cardboard to fit the front and back, like two slices of bread.
- Tape the entire bundle together so nothing can shift around.
The golden rule for moving glass and mirrors is to always transport them on their edge, never flat. Laying them flat makes them extremely vulnerable to shattering from bumps or pressure from other items.
Sometimes, a move isn't just a straight A-to-B journey, and you might need to store things for a bit. If you're looking for professional moving home storage services, it's worth exploring your options. And as you get deeper into your prep, other questions will surely come up. For more great advice from the pros, check out these answers to the top questions about moving house.
Navigating the complexities of a move requires careful planning and execution. At Emmanuel Transport, we provide the professional expertise to ensure every piece of your furniture is protected from start to finish. If you want a seamless, stress-free relocation in Perth, get in touch with us today for a free quote.