Before you even think about lifting a single piece of furniture, you need to get your packing supplies in order. This isn't just about grabbing a few old boxes and a roll of tape. To do this properly and protect your furniture, you need the right gear. Investing a little time and money upfront in the proper materials is genuinely the smartest thing you can do to make sure your prized possessions arrive in one piece.
Gathering Your Essential Packing Supplies

Alright, let's get you set up. Having everything you need on hand before you start turns a potential nightmare into a smooth, methodical job. This is where you don't want to cut corners; good quality supplies are your best insurance policy against dings, scratches, and breaks.
Think about the kind of furniture we have in Australia these days. The trend is all about modular sofas and clever, multi-functional pieces. That often means complex shapes, delicate finishes, and lots of individual components that need careful handling. Protecting these items properly is key, and you can get a better sense of why by looking at the trends in the Australian home furniture market.
To help you get started, here's a quick rundown of what you'll need.
Your Furniture Packing Toolkit
I've put together this table to show you exactly what we professionals use on every job. These are the non-negotiables for keeping furniture safe.
| Material | Primary Use | Pro Tip |
|---|---|---|
| Moving Blankets | The first line of defence. They provide thick padding against bumps, scrapes, and pressure during transit. | Ditch the old doonas. Real, padded moving blankets offer far superior protection. Use them to cover all large surfaces. |
| Industrial Shrink Wrap | Secures moving blankets to furniture without damaging tape. Also great for keeping drawers and cabinet doors shut. | Wrap it tight! The tension is what holds everything in place. It's a game-changer for awkward-shaped items. |
| Bubble Wrap | Essential for fragile items like glass tops, mirrors, artwork, and delicate furniture legs. | Use large-bubble wrap for heavy items and small-bubble wrap for lighter, more intricate pieces. Never let the bubbles face a painted surface directly. |
| Specialised Covers | Plastic mattress, sofa, and armchair covers protect against dirt, dust, moisture, and potential tears. | These are inexpensive and worth their weight in gold, especially if your items might be in storage for a while. |
| Furniture Sliders | Small pads that let you easily slide heavy furniture across floors without scratching them. | A must-have for your back and your floors. Keep a set handy for both the old place and the new one. |
| Disassembly Tools | A basic toolkit with screwdrivers, Allen keys, and a small wrench for taking apart items like bed frames and tables. | Put all screws and hardware from a single item into a labelled ziplock bag and tape it securely to the largest component. |
| Packing Tape | High-quality tape for sealing boxes and securing bubble wrap. | Never, ever tape directly onto a furniture surface. It can strip the finish or leave a sticky residue that’s a nightmare to remove. |
Getting these supplies sorted is the foundation of a successful move. With the right tools on hand, you're ready to tackle the actual wrapping and protecting.
Pro Tip: My golden rule is simple: tape only ever touches paper, plastic, or blanket—never the actual furniture. Adhering to this one rule will save you from a world of hurt later. A sticky residue or a stripped finish is the last thing you want to be dealing with when you're trying to set up your new home.
A Smarter Way to Disassemble Furniture
The thought of taking your furniture apart can seem like a huge headache, but trust me, it’s often the best thing you can do for your larger pieces. A little bit of smart disassembly makes things so much easier to carry and dramatically cuts down the risk of scrapes, dents, and breaks in transit. It’s a step that pays for itself ten times over.
Of course, the trick is knowing what should come apart and what should stay together. Big, modular items are your prime candidates—think IKEA bookshelves, bed frames, and most dining tables. They were designed to be built, so they can usually be un-built just as easily. On the flip side, steer clear of taking apart anything antique or solid wood pieces with glued joints. You could end up causing permanent damage that’s impossible to fix.
Document and Label Everything
Before you even think about grabbing a screwdriver, grab your phone. Take photos of the furniture from every angle imaginable. Get in close on the tricky bits: where the legs join the table, how the shelves are attached, any unique connections. This photo gallery will be your saving grace when it’s time to put everything back together.
Next up is creating a foolproof labelling system. Honestly, don't skip this. It's the difference between a smooth setup and a chaotic mess.
- Colour-Code It: Grab a pack of coloured dot stickers and assign one colour to each piece of furniture. As you take a part off, stick a dot on it. This way, all the "blue dot" pieces belong to the bed, and all the "red dot" pieces belong to the desk. Simple.
- Bag and Tag the Hardware: As soon as you take out a screw, bolt, or washer, put it straight into a small ziplock bag. Don't just chuck them all into one big "mystery hardware" tin. Label the bag with a permanent marker, being specific (e.g., "Dining Table Leg Bolts – 8 Total").
- Keep Everything Together: This is the most important part. Tape that labelled bag of hardware securely to the biggest part of the furniture it belongs to. The bolts for the bed frame get taped to the headboard. The screws for the bookshelf get taped to the largest shelf.
This system takes all the guesswork out of the equation. It turns a potentially frustrating puzzle into a simple, follow-the-steps task.
I once saw a client spend nearly two hours frantically digging through boxes for the bolts to their bed frame after an exhausting moving day. Ever since, I’ve preached that taping the hardware bag directly to the main piece is the single most important part of disassembly. It takes five seconds and saves you hours of stress.
When you do it this way, every piece has a home and every screw is accounted for. When you get to your new place, reassembly becomes a logical process instead of a nightmare. You’re essentially leaving a trail of breadcrumbs for your future, very tired self to follow.
Professional Wrapping And Protection Techniques
With your furniture disassembled, it’s time to get serious about protecting it. This is the part where you stop just packing and start protecting. A few professional techniques can turn a simple stack of blankets and plastic wrap into a fortress for your furniture, making sure everything from the coffee table to that antique dresser arrives without a scratch.
The aim here is total coverage. You’re essentially creating a protective cocoon around each piece to absorb bumps and fend off scrapes. This is absolutely critical for long-distance moves, which are becoming more common across Australia. As more people swap city life for the regions, their furniture is travelling further, making robust protection non-negotiable.
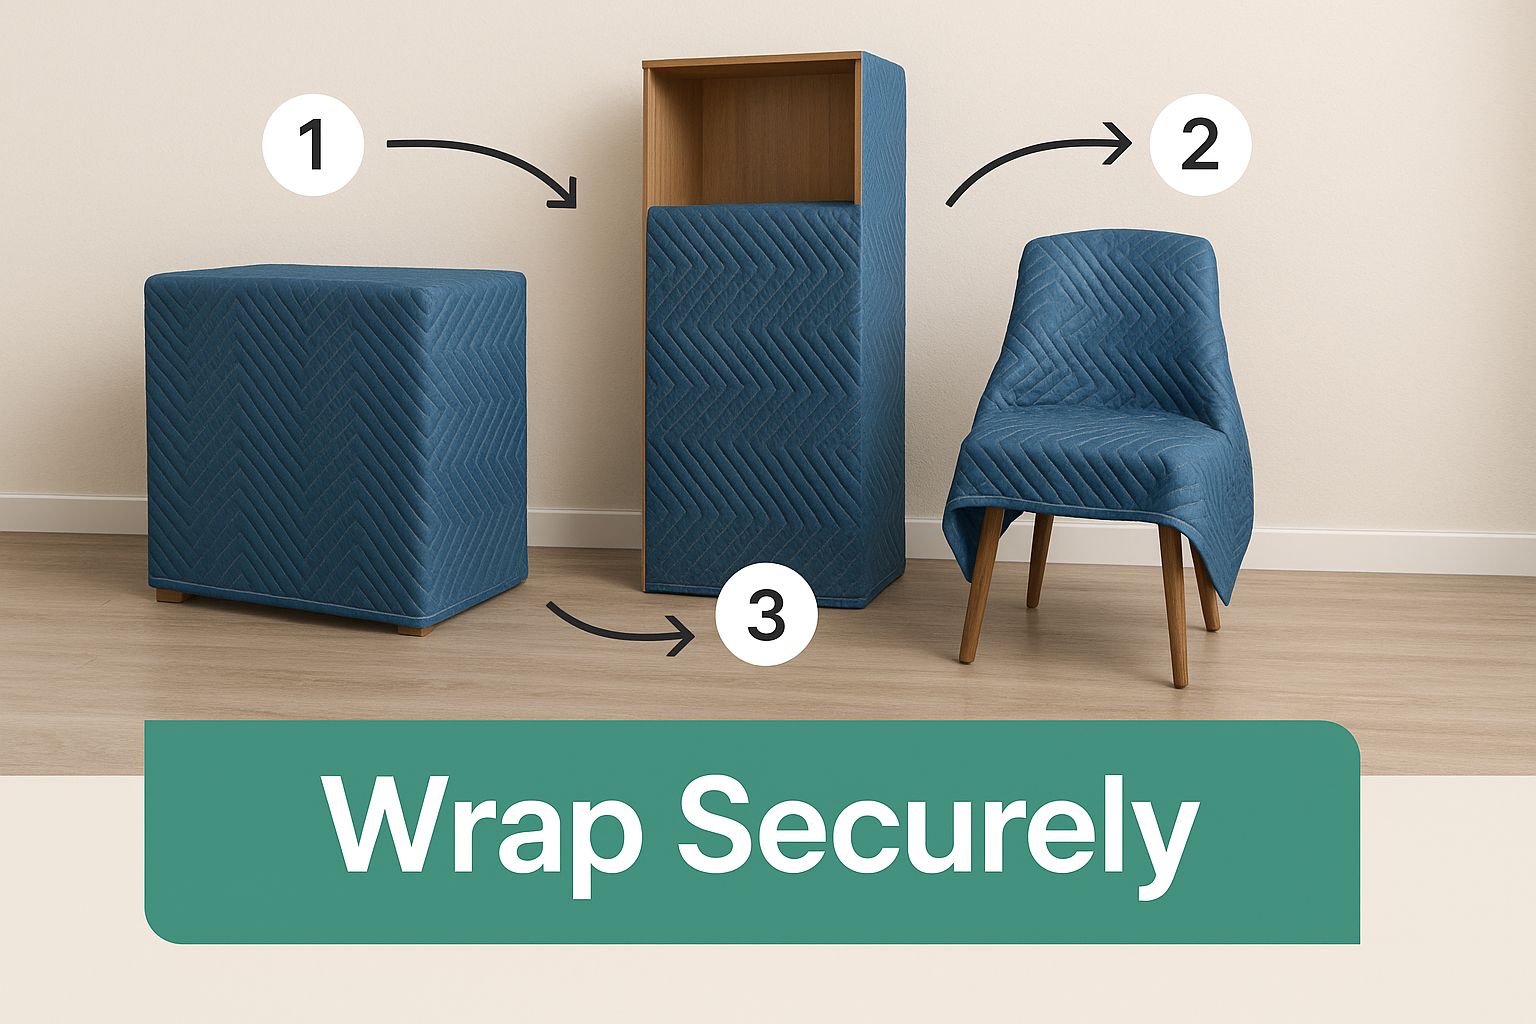
The Essential Mummy Wrap Method
One of the most reliable techniques in any removalist’s playbook is what we call the 'mummy wrap'. It does exactly what it sounds like: completely encases a piece of furniture so that no surface is left exposed. It's the go-to method for big-ticket items like sofas, dressers, and entertainment units.
Here's how to master it yourself:
- Drape and Tuck: Start by covering the entire item with heavy-duty moving blankets. Don't just throw them on top. You need to drape them completely over the sides and tuck them securely around the legs, overlapping the blankets to eliminate any gaps.
- Start Wrapping: Grab a roll of industrial stretch wrap and begin at the bottom of the piece. You'll want to pull the wrap tight as you circle the furniture, working your way up in overlapping layers, just like wrapping a bandage.
- Secure Everything: The tension from the wrap is what holds the blankets firmly in place, creating a snug, padded shell that won’t shift during the move. A crucial detail: the plastic wrap should only ever touch the blankets, never the actual surface of your furniture.
For a closer look at the best materials and methods, have a read of our comprehensive guide to https://emmanueltransport.net.au/furniture-protection-for-moving/.
Crafting Custom Cardboard Guards
Think about the sharp corners on your desks, tables, and bookshelves. They’re practically magnets for dings and dents in tight hallways. While you can buy pre-made corner protectors, it’s just as effective—and cheaper—to make your own from leftover cardboard boxes.
Just cut a square of cardboard, fold it in half to form a 90-degree angle, and pop it over the corner. You can hold it in place with a bit of stretch wrap or tape it to the moving blanket. Never, ever tape it directly to the wood finish. It's a simple trick, but it provides a surprisingly effective buffer against knocks from doorways and other hazards.
Layering for Delicate And High-Value Items
Some pieces just need more love. We’re talking about items with delicate carvings, a high-gloss finish, or major sentimental value. For something like an antique headboard or a lacquered cabinet, you need to think in layers.
Expert Takeaway: I always tell people to think of it like dressing for a blizzard. Each layer has a specific job—cushioning, surface protection, and security—and they all work together to create the ultimate defence against the chaos of a move.
Start with a layer of bubble wrap for impact cushioning. Then, wrap the whole thing in a soft moving blanket to guard against abrasion. Finally, use stretch wrap to bind it all together tightly. When it comes to your most precious items, understanding the nuances of shipping antique furniture is vital. This careful, layered approach is the gold standard when the stakes are high.
Handling Those Awkward and Fragile Items
We all have them. That one odd-shaped armchair, the massive glass tabletop, or an antique cabinet that gives you a slight panic just thinking about moving it. These are the pieces that defy a standard box, but they’re not impossible to move safely. A good packing strategy is about tackling these challenges head-on, not just the easy stuff.
Let's talk about a classic moving headache: a big glass tabletop. The trick is to create a protective 'sandwich'. Grab two large, flat pieces of heavy-duty cardboard—make sure they're a bit bigger than the glass itself. Lay one piece on the floor, put a moving blanket on it, then carefully place the glass on top. Add another blanket, followed by the second piece of cardboard. Now, tape the whole package together securely and, most importantly, label it "FRAGILE – GLASS" in big, bold letters on both sides.
Crucial Tip: Always, always transport glass tabletops and large mirrors on their edge, never flat. Laying them horizontally makes them incredibly susceptible to shattering from a sudden jolt or if something heavy gets placed on them. Standing them vertically helps distribute any impact and dramatically reduces the risk.
Keeping Your Upholstered Furniture Clean
Your favourite sofa or armchair needs more than just padding. The real threats are dirt, moisture, and rips. Moving blankets are great for bumps and scrapes, but I highly recommend investing in specialty plastic sofa and armchair covers. These are essentially giant, heavy-duty bags that you can slide right over your furniture, creating a waterproof and dirt-proof shield.
Once it’s sealed in plastic, then you can wrap the piece in moving blankets for that extra cushioning. This two-layer approach means that even if the blanket gets a bit grimy or damp in the truck, your actual upholstery stays perfect. It’s a small, cheap step that can save you from a massive cleaning bill or, worse, permanent damage.
Prepping Your Big Appliances
Moving items like your fridge or washing machine involves more than just muscle. You have to prep them properly to avoid damaging their internal parts. It's not just about the heavy lifting; it's about making sure they're correctly decommissioned first. For guidance on the physical effort involved, take a look at our tips on how to move heavy furniture to prevent injuries.
Before the movers arrive, get each appliance ready:
- Fridges and Freezers: These need to be defrosted at least 24-48 hours before moving day. Give the inside a thorough clean and make sure it's completely dry to stop mould from growing. Tape the doors shut, but always place a small towel or cloth under the tape to protect the finish from sticky residue or scratches.
- Washing Machines: This one is non-negotiable—you must install the transit bolts (sometimes called shipping pins) to lock the drum in place. If you skip this, the drum can swing around violently during transit, causing serious, often irreparable, damage. Don’t forget to disconnect the hoses, drain them completely, and pop them inside the drum so they don’t go missing.
Putting in this extra work for your more challenging furniture might feel like a chore, but it's what separates a smooth move from a day filled with expensive repairs and disappointment.
Loading the Truck to Prevent In-Transit Damage
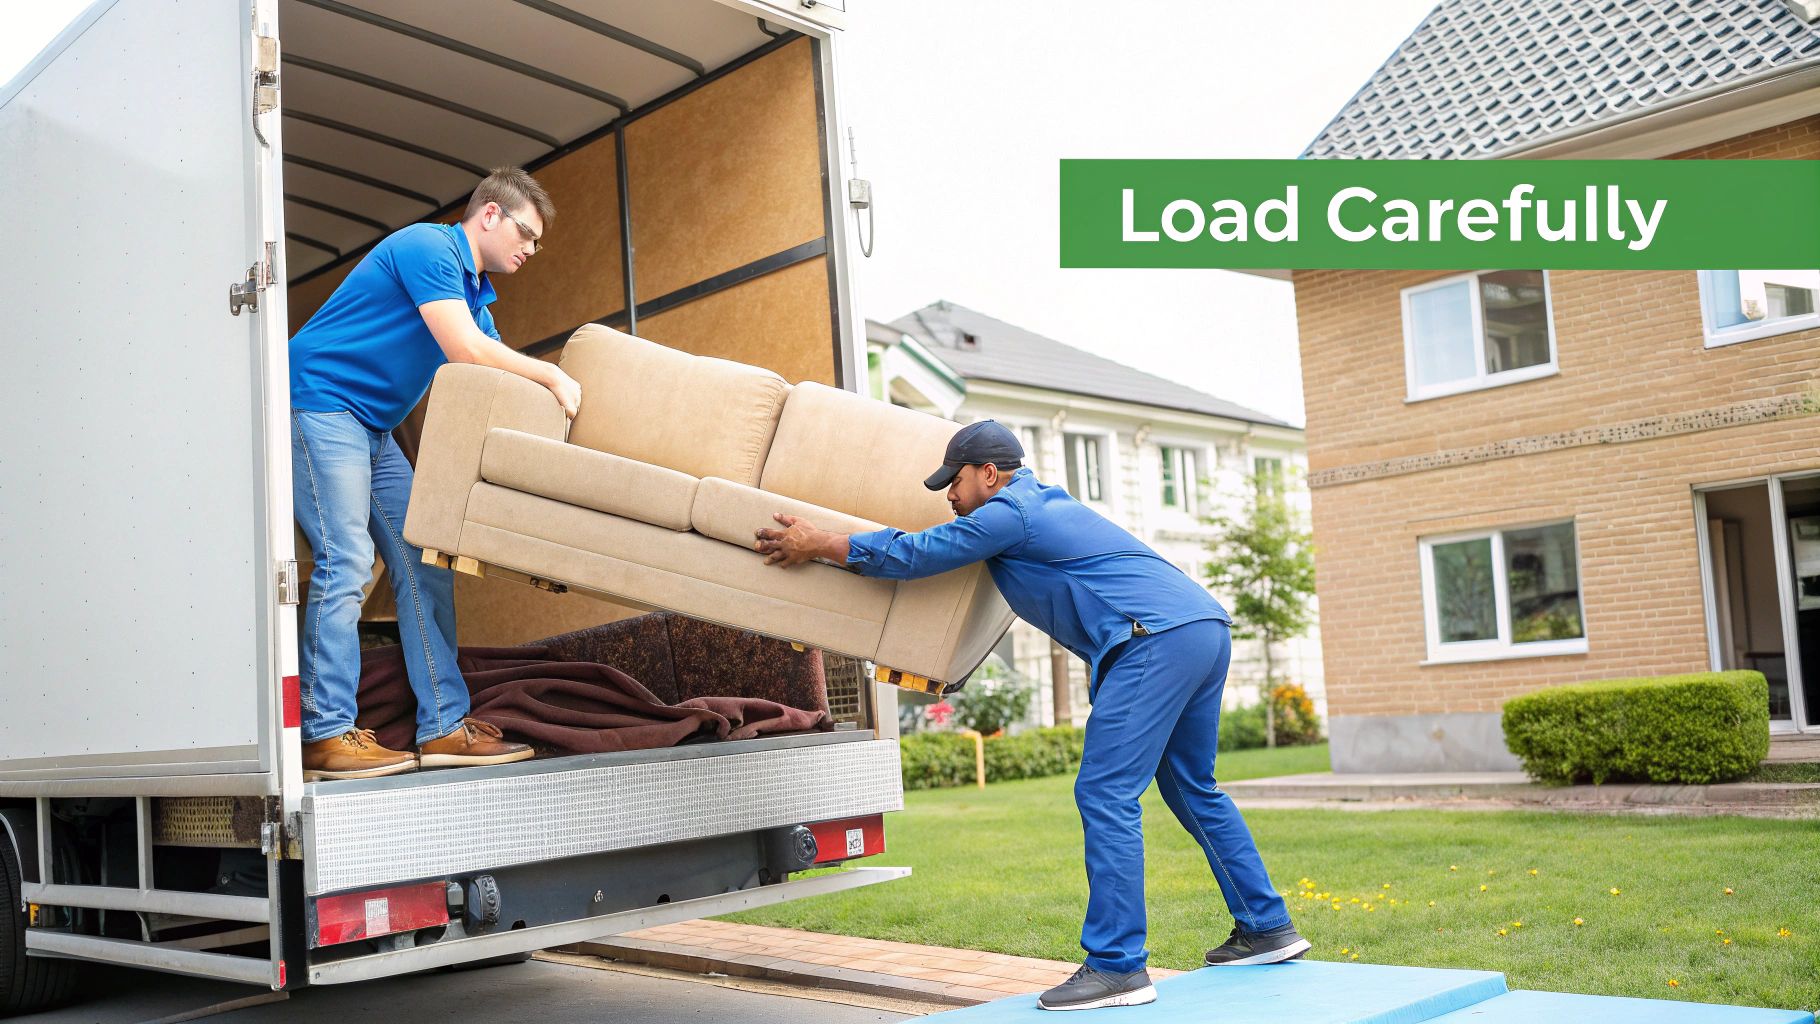
You can wrap your furniture in a hundred layers of protection, but it won't mean a thing if everything starts sliding around the second the truck pulls away. Honestly, how you load the truck is just as important as how you wrap each piece. Think of it as a game of Tetris, but with your most valuable possessions.
Poor loading is probably the number one cause of damage on moving day. The goal is to create a solid, stable block of items that can’t shift, even on a bumpy road.
Building Your Base Layer
Everything starts with a solid foundation. The heaviest, bulkiest items you own need to go in first, right up against the front wall of the truck (the part closest to the cab). This is your anchor.
Start by lining up your biggest and most solid pieces across the full width of the truck. This base layer will support everything else, so it needs to be unshakeable.
Good candidates for this foundational layer include:
- Large appliances like fridges and washing machines (once they’re prepped, of course).
- Solid timber furniture—think chests of drawers, heavy desks, and buffets.
- Your heaviest boxes, especially those packed with books or dishes.
Placing these items at the front keeps the truck's centre of gravity low and forward, which makes for a much safer drive. Pack them in snugly, leaving as little wiggle room as possible.
This sort of planning is especially crucial during peak moving times. In Australia, the demand for removalists skyrockets over summer and at the end of each month. If you're hiring professionals, book them well in advance. For more tips on timing your move, it's worth checking out some insights into Australian moving trends.
Stacking and Securing the Upper Layers
With your solid base in place, you can start building upwards. The golden rule is simple: heaviest on the bottom, lightest on top. Medium-weight boxes and smaller pieces of furniture can sit on top of your heavy base.
Now, what about those awkward long and flat items? They need special treatment. Whatever you do, don't lay them flat where something heavy could be stacked on top of them. That’s just asking for trouble.
Pro Tip: Always load items like mattresses, box springs, big mirrors, and tabletops on their edge, standing vertically against the long walls of the truck. Use tie-down straps to lash them securely to the truck’s internal railings.
This simple trick makes them much stronger and stops them from snapping or turning into a projectile if the driver has to brake suddenly.
For the final touch, use your softest items to fill any remaining gaps. Bags of clothes, doonas, cushions, and pillows are perfect for wedging into empty spaces. Remember, a tightly packed truck is a safely packed truck. No gaps means no movement, and no movement means no damage.
Your Quick Guide to Common Furniture Packing Questions
No matter how well you plan your move, a few questions always seem to pop up when you get to the big stuff. Getting these sorted early can save you a world of headaches later on. Let's tackle some of the most common furniture-packing queries I hear all the time.
One of the first things people wonder is whether they really need to empty their drawers. The answer is a definite yes, always. Even if it’s just light clothes, the extra weight puts a surprising amount of strain on the furniture’s frame, especially when it's being carried or bouncing around in a truck. It’s a simple preventative step that keeps your dressers and cabinets from getting wobbly or damaged.
Protecting Wooden Surfaces
Keeping wooden furniture pristine is another huge concern, and for good reason. Scratches are a pain to fix. The secret is to use a few protective layers.
- Start Clean: Give every piece a quick wipe-down. Any dust or grit left on the surface can act like sandpaper when it’s wrapped up.
- Wrap it Right: Use thick, padded moving blankets to cover the entire piece. I always pay extra attention to the corners, edges, and delicate legs – these are the spots that get knocked the most.
- Tape Smart: Secure the blankets with packing tape, but here's the crucial part: never let the tape touch the wood. It can strip the finish right off. Only tape the blanket to itself.
If you want to go the extra mile, a final layer of industrial shrink wrap over the blankets will protect against moisture and keep everything snug.
The biggest packing mistake I see is people rushing. Taking five extra minutes to properly wrap a table or empty a chest of drawers is what separates furniture that arrives safely from pieces that need expensive repairs.
Deciding Between DIY and Professional Help
"Should I just hire someone to pack my furniture?" This is a big one, and it really comes down to what you're moving.
If you have valuable antiques, extremely heavy items, or awkwardly shaped pieces, calling in a professional removalist is a wise move. They’ve got the experience, the right gear, and all the specialty materials to do the job safely. But if you're working with a tight budget and your furniture is pretty standard and sturdy, you can definitely get it done yourself using the methods we've covered.
For a few more insights from the pros, check out the top five questions about moving house.
While you're deep in packing mode, don't forget about leaving your old place in good shape. This ultimate end of tenancy cleaning checklist is a great resource to make sure you get your bond back without any fuss.
Ready to make your move completely stress-free? Let the experienced team at Emmanuel Transport handle the heavy lifting. Get your free, no-obligation quote today!