
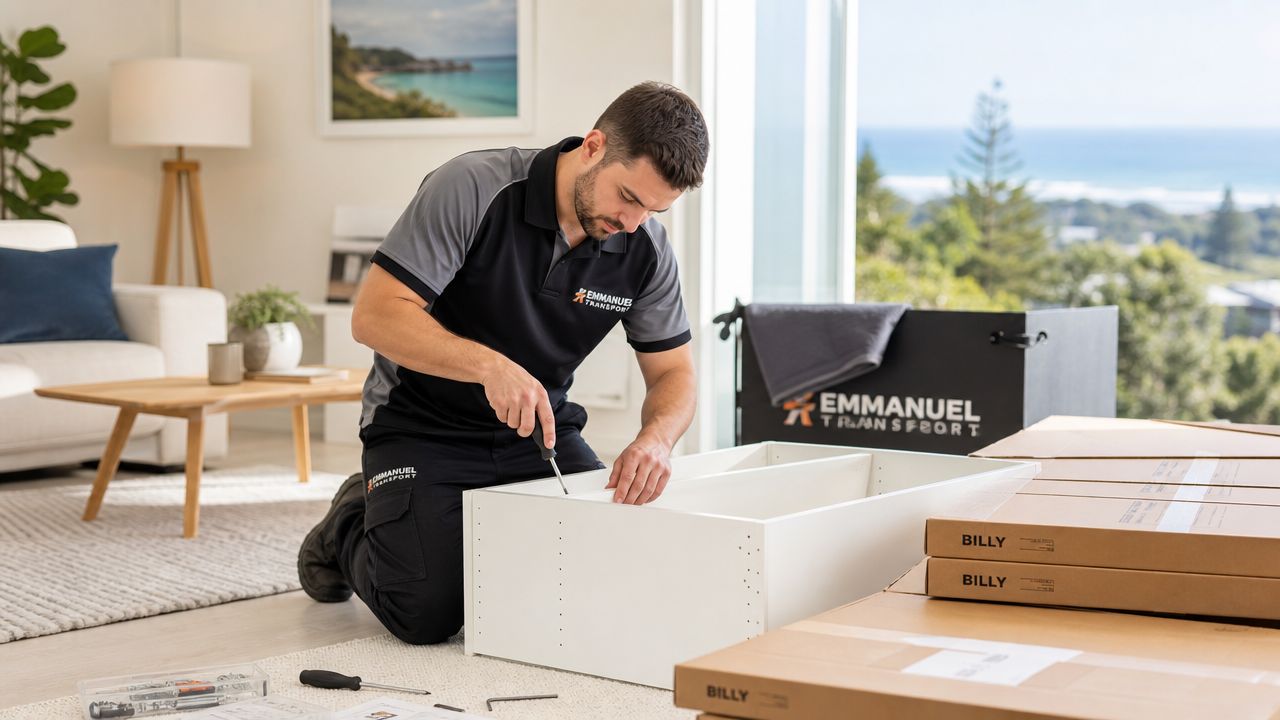
You’ve got the boxes in the hallway, the instruction booklet that says everything without words, and a strong suspicion that one wrong step will turn a clean Saturday into a full-blown argument. That’s the usual starting point for IKEA furniture assembly in Perth.
The struggle isn’t due to carelessness. It arises because flatpack looks simple until you’re matching cam locks, dowels, rails, and panels that only differ by a few drill holes. Add a move into an older Perth home, or a place closer to the coast, and the job stops being just assembly. It becomes a question of stability, safety, and whether the piece will still sit square months later.
Table of Contents
- The IKEA Assembly Experience Deconstructed
- Estimating Assembly Time and Costs
- Common Assembly Challenges and Perth-Specific Pitfalls
- DIY Assembly or Hiring a Professional Mover
- Pre-Move Checklist for IKEA Furniture
- Make Your Move Seamless with Emmanuel Transport
The IKEA Assembly Experience Deconstructed
Flatpack is a bit like Lego for adults, except the tolerances matter and the mistakes are expensive. If a panel goes in backwards on a LACK side table, you lose a few minutes. If it happens on a PAX frame or a tall drawer unit, you can damage the board, weaken the fasteners, or end up dismantling half the piece.

What is actually in the box
Open the carton carefully and separate everything before you touch a screw. Most IKEA furniture assembly jobs include panels, bagged hardware, rails or braces, and a booklet built around pictograms rather than text. Those diagrams are efficient, but they assume you’ll compare every panel orientation before tightening anything.
The basic tool kit is usually small. IKEA’s technical specifications require the provided Allen wrench and a standard Phillips head screwdriver, and the instructions follow a strict build upwards method where the base is secured before vertical parts such as side panels or legs are attached, according to IKEA assembly instruction guidance.
That upward build sequence isn’t fussy paperwork. It keeps the frame aligned and reduces the chance of stressing particleboard edges while the piece is still loose.
Practical rule: Don’t fully tighten every fastener the second it goes in. Snug the frame first, check the panels are facing the right way, then tighten in sequence.
If you’re assembling during a move, leave enough floor space around the item to rotate it safely. That matters even more in apartments and tight bedrooms where a nearly finished frame has to be tipped upright without clipping a wall. If you’re organising the full move as well as the assembly, it helps to plan the room access and staging in advance with a proper Perth removals and storage service.
Why the order matters more than people think
The biggest beginner mistake isn’t missing hardware. It’s reading the booklet as a suggestion instead of a sequence.
A stable IKEA piece usually comes together in this order:
- Base first: Get the bottom panel and any lower rails square.
- Verticals second: Side panels, internal dividers, or legs go on once the base is true.
- Bracing later: Backing boards and cross braces pull the structure into alignment.
- Doors and drawers last: These are finishing components, not structural ones.
Sharp edges and pinch points are real. Keep fingers clear anywhere two panels close together under tension.
Treat the diagrams as assembly engineering, not decoration. Once you do that, the job feels less chaotic and a lot more manageable.
Estimating Assembly Time and Costs
People usually underestimate IKEA furniture assembly for the same reason they underestimate painting a room. The visible part looks quick. The slow part is sorting, checking, aligning, correcting, and only then tightening.
This visual gives a rough planning snapshot.

What IKEA charges tells you
A useful benchmark is IKEA’s own service pricing. IKEA Australia lists assembly starting at a $40 call-out fee, with listed examples including a sofa-bed at $100, a double-door PAX wardrobe at $120, and an adjustable sit/stand desk at $60 on its assembly services page.
That pricing tells you two things. First, assembly has a real labour value even when the furniture arrives in tidy boxes. Second, larger and more fiddly pieces don’t just take longer. They require more handling, more floor space, and more opportunities for a small mistake to turn into rework.
A simple side table can be straightforward. A wardrobe, drawer unit, or bed with storage is where most DIY timelines go off track.
What blows out the timeline
Assembly time stretches when one of these shows up:
-
Mixed hardware on the floor
Once screws, dowels, cams, and brackets get merged, every step slows down. -
Tight rooms
Large pieces often need to be built flat, then lifted upright. Ceiling height and wall clearance matter. -
Uneven floors
A frame that looked square while flat can twist once it’s upright.
Before you book help or commit your weekend, watch how a typical IKEA setup flows in practice.
There’s also the hidden cost that is often overlooked. Fatigue. Once you’re tired, you rush the final steps, and the final steps are usually drawers, doors, levelling, or anchoring. That’s where poor results show up first.
Common Assembly Challenges and Perth-Specific Pitfalls
Every city has the usual flatpack headaches. Perth has those, plus a couple of local issues that generic assembly guides barely mention.
The problems everyone hits
The first frustration is visual similarity. Two side panels can look identical until you notice the cam holes are mirrored. The second is overconfidence with power tools. Particleboard doesn’t forgive overtightening, especially around edge fixings and hinge screws.
Then there’s the classic leftover-part panic. Sometimes there is a spare. Sometimes the “extra” piece was meant to be in step six and you only notice in step fourteen.
A few habits prevent most of this:
- Sort hardware first: Use small trays, bowls, or labelled bags.
- Check panel faces: Veneer finish, pilot holes, and edge banding tell you what’s front, back, top, and bottom.
- Dry-position key parts: Hold them together before fastening to confirm orientation.
If a connection needs force early in the build, something is usually backwards, upside down, or in the wrong slot.
The Perth issue most guides miss
Tall IKEA items need anchoring. That’s standard. The problem in Perth is that the supplied fixings don’t always suit the wall they’re going into, especially in older homes with ageing masonry, patchy substrates, or timber studs that aren’t giving you the bite you expect.
A 2025 survey of Perth homeowners found that 42% of tall IKEA units experienced at least one anchor failure within 12 months due to the standard supplied fixings being inadequate for common WA wall types, according to research on IKEA assembly issues in WA.
That’s the part many DIY guides skip. They tell you to anchor the unit, which is correct. They don’t spend enough time on whether the fixing method is right for your wall.
In practice, the risky situations are familiar:
- Older brick or masonry walls where the anchor loosens under repeated load.
- Timber stud walls where the fixing misses solid timber or lands too close to a weak section.
- Children’s rooms and family spaces where drawers are opened hard and often.
For Perth homes, especially older ones, wall anchoring isn’t the end of the job. Verifying the wall type and choosing suitable fixings is the job.
DIY Assembly or Hiring a Professional Mover
Some IKEA pieces are fine for a calm DIY afternoon. Others are better treated like a small installation project. The right call depends less on confidence and more on complexity, space, and what happens if you get it wrong.
A practical decision test
DIY makes sense when the item is compact, the instructions are short, and you’ve got the room to lay everything out. It also helps if the furniture isn’t being moved again soon and doesn’t need anchoring, levelling across uneven floors, or precise placement in a tight room.
Hiring help makes more sense when the furniture is large, awkward, or part of a relocation. That’s why professional demand is so high. Leading Australian assembly services have built over 10,000 IKEA products, including complex PAX wardrobes and Besta units, as shown on Kitset Assembly Services’ IKEA page.
That number matters because it reflects behaviour, not theory. A lot of people who could attempt the job still decide not to.
One useful way to think about it is the same way collectors think about wall-mounted pieces and delicate interiors. When placement, safety, and finish all matter at once, specialised handling pays off. The same logic shows up in this guide for art collectors and designers, where the challenge isn’t just lifting an item but securing it correctly in the actual conditions of the space.
DIY vs Professional Assembly Comparison
| Factor | DIY Assembly | Professional Assembly (e.g., Emmanuel Transport) |
|---|---|---|
| Cost | Lower cash outlay, but you carry the time cost and risk of mistakes | Paid service, but labour and handling are bundled into one job |
| Time investment | Can stretch if panels are misread, parts get mixed, or space is tight | Usually more predictable because the team already knows the hardware systems |
| Tools required | You’ll need the basics ready and may need extras depending on the item and wall type | The team arrives equipped for assembly, dismantling, and move-day handling |
| Potential for error | Higher if it’s your first PAX, MALM, or multi-drawer build | Lower when the team does this work regularly |
| Stress level | Fine for simple jobs, frustrating during a move | Easier when assembly is coordinated with transport and setup |
If you’re moving house, the decision often comes down to coordination. One team handling packing, dismantling, transport, and reassembly usually creates fewer handoff problems than splitting it between multiple providers. For move-day planning, that can sit alongside a broader packing service for Perth relocations.
Pre-Move Checklist for IKEA Furniture
IKEA furniture often survives one move well. It survives the second one when the dismantling is organised, the hardware stays matched to the correct piece, and the panels don’t get chipped in the truck.

What to do before the truck arrives
Don’t start by undoing screws at random. Start by documenting the finished item.
- Take photos first: Capture the front, back, drawer runners, hinges, and any tricky joinery.
- Label every bag: Keep screws, cams, dowels, and brackets with the exact item they belong to.
- Mark hidden faces: Painter’s tape on the inside edge of panels saves guessing later.
- Reverse the build order: Remove doors, drawers, shelves, and backing before you break the main frame.
- Wrap vulnerable parts: Corners, drawer fronts, glass inserts, and long side panels need protection.
The calmest dismantles happen when each furniture piece gets its own hardware bag and its own photo set. That sounds basic, but it prevents the most common reassembly problem after a move: mixing similar fasteners from different products.
Keep hardware with the furniture, not in a shared “spares” box. Shared boxes create chaos on reassembly day.
If you want the move itself mapped out properly, a structured moving planner for Perth households helps sequence the dismantling before the packing gets hectic.
How to reassemble for a longer second life
Perth’s coastal conditions change how particleboard and MDF behave over time. A University of Western Australia study found that 38% of IKEA units in coastal Perth suburbs showed joint separation or warping within 18 months due to high humidity, as referenced in this discussion of IKEA assembly durability.
That doesn’t mean coastal homes can’t use IKEA furniture. It means reassembly needs more care.
Focus on these points after the move:
- Let panels acclimatise indoors before reassembly if they’ve come out of storage or a damp truck morning.
- Check every old fixing point for swelling or crumbling before reusing the same screw path.
- Avoid forcing joints closed if the board edges have puffed slightly. Realign first.
- Place furniture with airflow in mind rather than hard against damp external walls.
What doesn’t work is pretending every suburb has the same conditions. A piece reassembled near the coast needs a bit more patience and a bit less brute force.
Make Your Move Seamless with Emmanuel Transport
The hard part of IKEA furniture assembly usually isn’t one dramatic failure. It’s the pile-up of small problems. A panel chipped on the stairs. Hardware mixed between rooms. A wardrobe frame that was fine in the old house but now sits on a different floor and needs proper levelling before the doors will behave.
That’s where an experienced removalist team earns their keep. The job isn’t only transport. It’s dismantling in the right sequence, protecting the parts that get damaged in transit, and rebuilding the piece so it works in the new room rather than merely standing up.

Where a removalist team saves the most grief
The biggest advantage is continuity. The same team sees the furniture before it comes apart, handles it through the move, and puts it back together with the room layout, wall condition, and access constraints in mind.
That matters most when you’re dealing with:
- Large wardrobes and storage systems that don’t tolerate rough handling
- Office relocations where downtime and misplaced hardware slow setup
- Apartments and townhouses where stairs, lifts, and narrow turns complicate transport
- Family homes where tall units need careful final positioning and secure fixing
Emmanuel Transport handles Perth relocations with dismantling, wrapping, transport, and reassembly as part of the same practical workflow. For IKEA pieces, that usually means less damage, less time spent hunting for fittings, and fewer surprises once the truck is unloaded.
If your flatpack furniture is part of an upcoming move, the easiest way to avoid wasted time and prevent avoidable damage is to book a clear quote with Emmanuel Transport.
